Can You Convert Non-Tubeless MTB Rims to Tubeless? A Complete Guide

Converting a mountain bike from traditional inner tubes to a tubeless tire system can improve trail comfort, reduce pinch-flat problems, and provide additional protection against small punctures. However, many older and budget-friendly mountain bikes come with conventional rims that were never designed for tubeless operation.
This raises an important question: Can you convert non-tubeless MTB rims to tubeless at home?
The answer depends on your wheel’s construction, tire compatibility, and whether the manufacturer approves a suitable conversion system. Some conventional wheels can be converted using a purpose-designed conversion kit, while others should remain on inner tubes.
Simply installing rim tape, a tubeless valve, and sealant does not make every standard rim safe for tubeless use. The tire bead must also fit securely against the rim, and the complete system must withstand the forces generated during riding.
This guide explains how to check compatibility, understand conversion methods, prepare the necessary equipment, and complete an approved tubeless installation. It also covers common mistakes, maintenance requirements, and situations where replacing your wheels is the better option.
Table of Contents
Can You Convert Non-Tubeless MTB Rims to Tubeless?
Sometimes, but not every conventional mountain bike rim is suitable. A tubeless system requires an airtight rim bed and a secure tire-to-rim interface. The rim must hold the tire bead correctly under the loads and pressures associated with mountain biking.
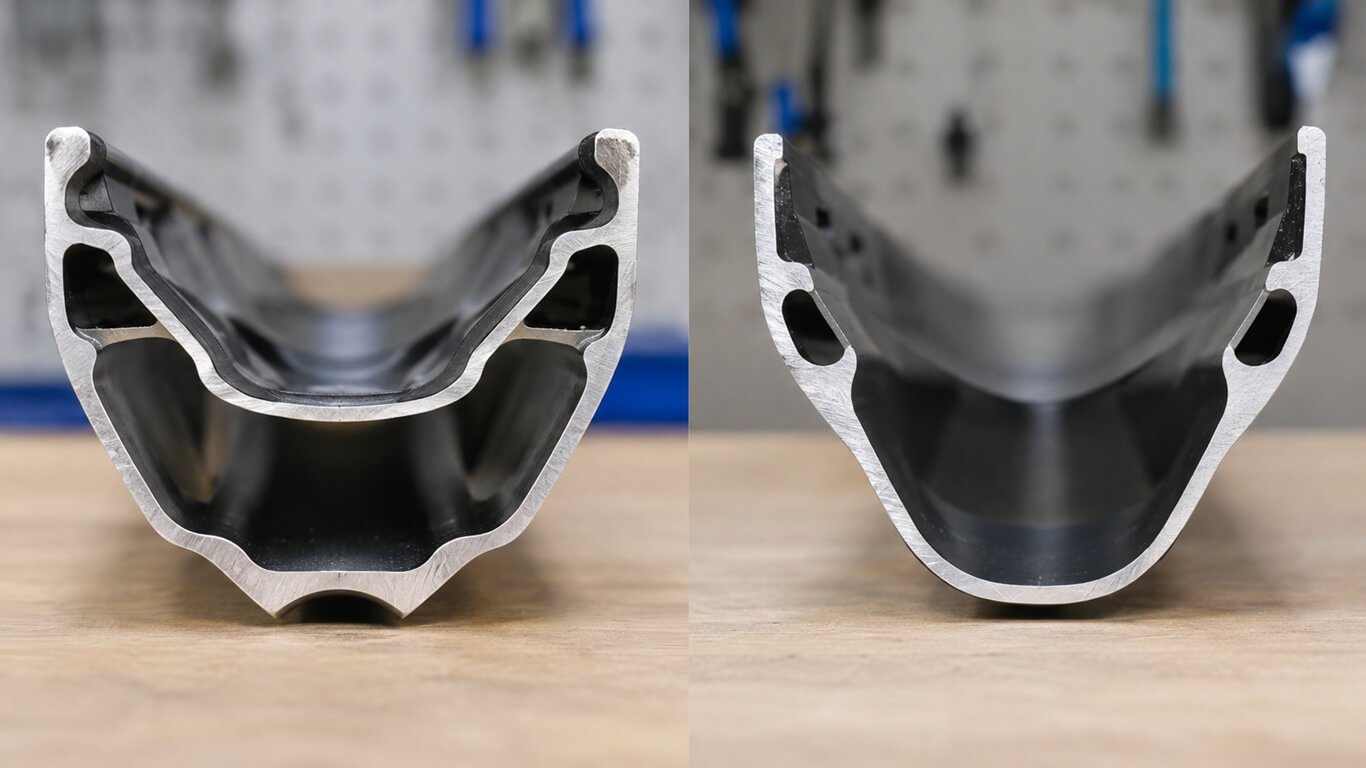
A tubeless-ready wheel is designed with these requirements in mind. Its rim profile, bead-seat geometry, and internal construction are intended to work with compatible tubeless tires. Some older conventional wheels may support a manufacturer-approved conversion system.
These systems can include specially designed rim strips that help create the necessary sealing surface and improve bead retention. However, ordinary adhesive tape cannot change an unsuitable rim profile into a properly engineered tubeless rim.
Before purchasing a conversion kit, check the exact rim and wheel model with its manufacturer. If the manufacturer does not approve tubeless operation or identify a compatible conversion system, continue using an inner tube or consider a tubeless-ready replacement wheelset.
Park Tool explains why using incompatible tubeless components can create an unreliable or unsafe setup in its guide to tubeless tire compatibility.
Tubeless-Ready vs. Standard MTB Rims: What’s the Difference?
Understanding the difference between conventional and tubeless-ready rims is the first step toward a successful conversion.
Tubeless-Ready Rims
Tubeless-ready rims are specifically designed to support tubeless tire installation. Depending on their construction, they may feature:
- A bead-seat profile designed to retain compatible tire beads.
- A rim bed that can be sealed with appropriate tubeless tape.
- A valve opening designed for a tubeless valve.
- A rim channel that supports the manufacturer’s specified tire and pressure combinations.
Many tubeless-ready rims require only compatible rim tape, a tubeless valve, a suitable tire, and sealant.
Standard Non-Tubeless Rims
Traditional MTB rims were designed to work with inner tubes. Their construction includes:
- Conventional bead-seat profiles.
- Rim beds that are difficult to seal reliably.
- Exposed spoke holes or uneven internal surfaces.
- Tire and rim combinations that have not been approved for tubeless use.
Some older wheels can work with specific conversion systems, but their suitability must be confirmed individually.
Comparison of the Two Rim Types
| Feature | Tubeless-ready rim | Standard rim |
|---|---|---|
| Designed for tubeless use | Yes | Not necessarily |
| Rim tape installation | Usually | Depends on approved system |
| Tubeless valve | Usually supported | Depends on conversion design |
| Tire compatibility | Must be checked | Must be checked |
| Conversion difficulty | Generally easier | Can be more complicated |
| Manufacturer approval | Normally available | Must be verified |
One important detail is that a rim’s appearance alone cannot confirm tubeless compatibility. Check the manufacturer’s specifications instead of relying on visual inspection.
How to Check Whether Your MTB Rims Are Compatible
Before starting any conversion, identify your wheel and tire specifications.
1. Find the Rim Model and Manufacturer
Look for the manufacturer’s name, model number, or product markings on the rim. If you cannot identify the model, check your bicycle’s original specifications or contact the bike manufacturer. Search the manufacturer’s website for terms such as:
- Tubeless Ready
- Tubeless Compatible
- TLR
- TCS
- UST
- Approved tubeless conversion
These terms can indicate compatibility, but their exact meaning depends on the manufacturer’s system.
2. Check the Tire’s Specifications
A compatible rim does not automatically make every tire suitable for tubeless use. Look for tire markings such as:
- Tubeless Ready
- TLR
- Tubeless Easy
- TCS
- UST
Confirm that the tire manufacturer approves the tire for your specific rim type and size. A conventional tube-type tire may have a different bead construction and may not retain air or seat securely in a tubeless setup.
3. Inspect the Rim’s Condition
Check the rim for:
- Cracks around the spoke holes.
- Dents or damaged sidewalls.
- Corrosion or structural deterioration.
- Damaged bead-seat areas.
- Deep scratches or sharp edges inside the rim bed.
Do not attempt to convert a damaged rim. Tubeless pressure can expose existing structural weaknesses.
4. Confirm the recommended conversion method
If your wheel is not marked tubeless-ready, contact the manufacturer and ask whether a specific conversion system is approved.
Do not assume that a generic tubeless kit is suitable simply because its dimensions appear to match your rim. This step is particularly important for older MTB wheels and inexpensive factory-built wheelsets.
What You Need for an Approved MTB Tubeless Conversion
Once compatibility has been confirmed, gather the components required by the approved conversion system.
1. Tubeless rim tape or an approved conversion strip
Rim tape seals the spoke holes and prevents air from escaping through the rim bed. The correct tape must have the appropriate width, adhesive properties, and compatibility with the rim and sealant.
For a conventional wheel, a specially designed conversion strip may be necessary if the manufacturer explicitly supports that system. Do not substitute ordinary electrical tape, duct tape, or generic household adhesive tape.
2. Tubeless valves
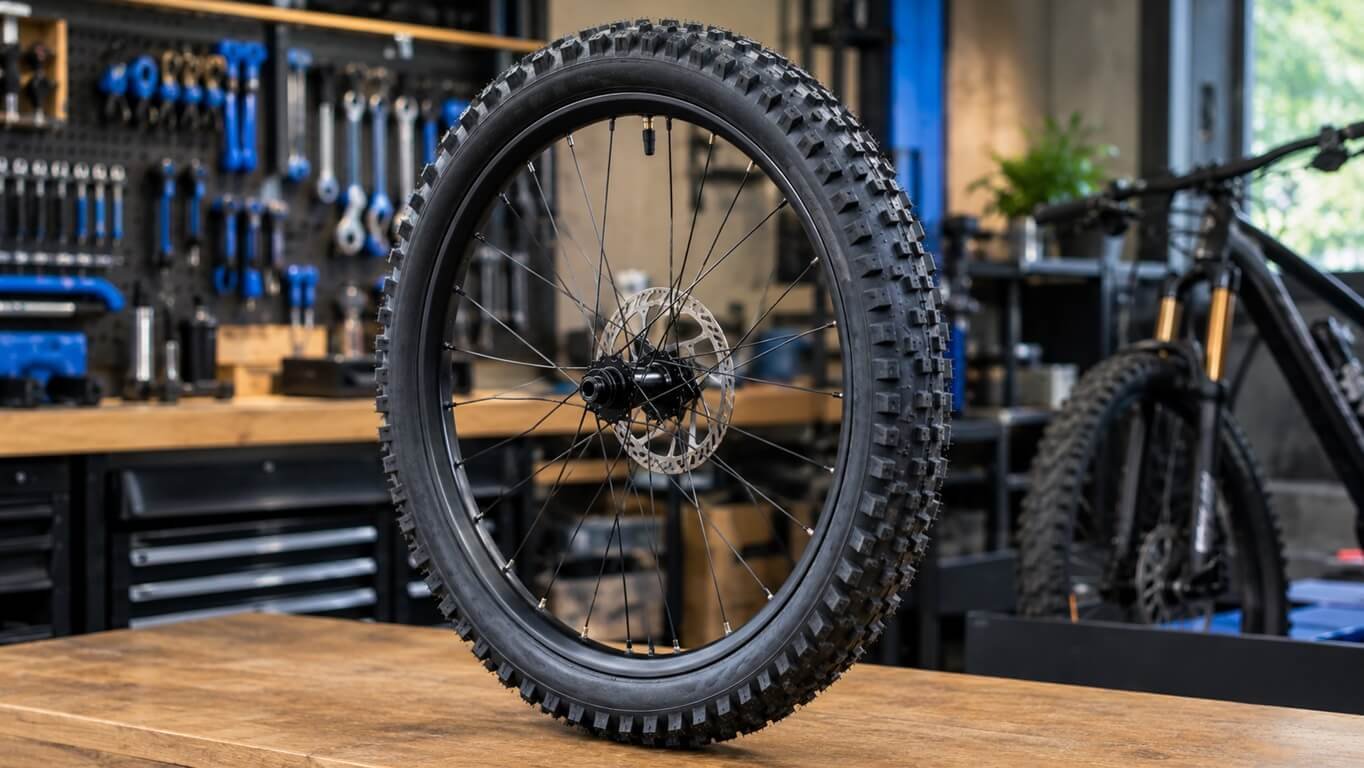
Tubeless valves create an airtight connection at the valve opening. They generally feature:
- A valve stem.
- A rubber sealing base.
- A retaining nut.
- A removable valve core on many models.
Choose a valve compatible with the rim’s valve-hole diameter and rim profile. For additional guidance on rim preparation, tape application, valve installation, and tire setup, consult Park Tool’s tubeless tire conversion instructions.
3. Tubeless-Compatible MTB Tires
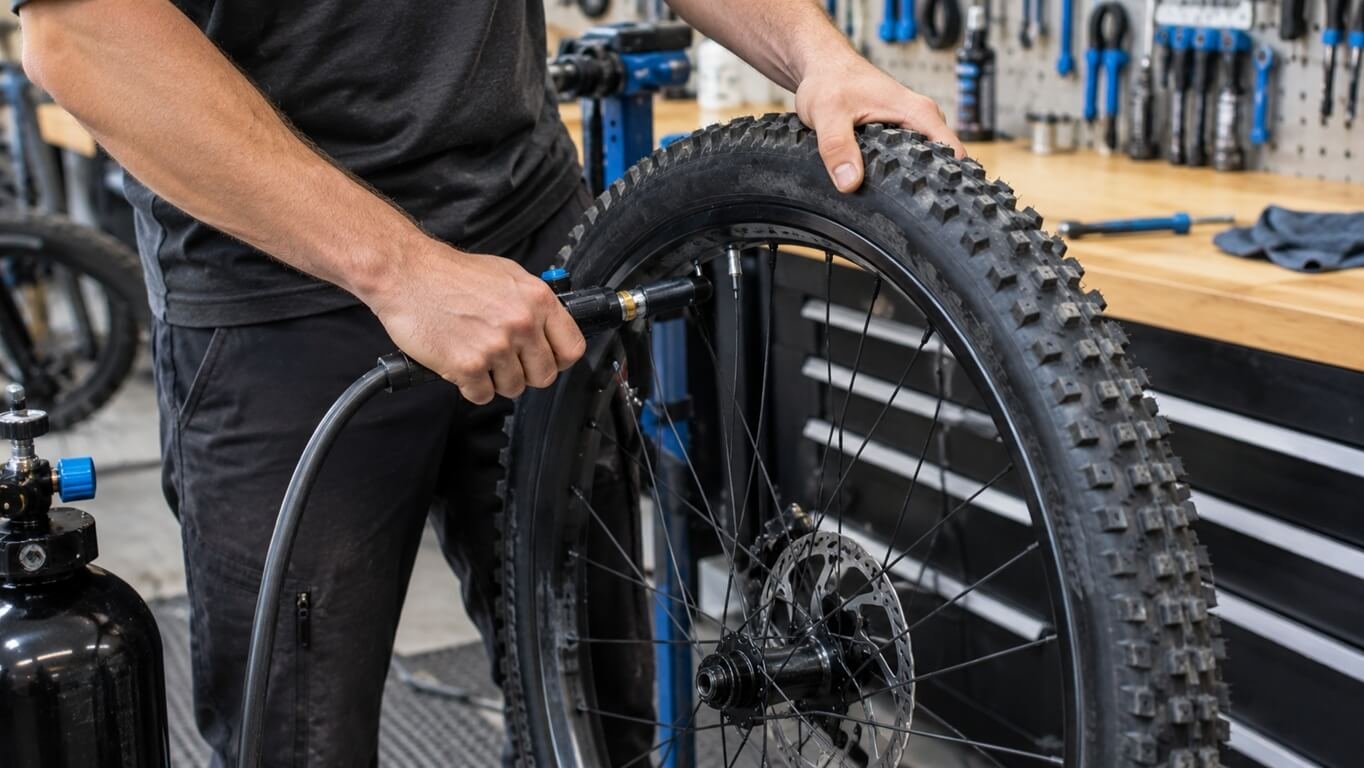
Tubeless-compatible tires are designed to work without an inner tube. Their bead construction and casing help establish and maintain an appropriate seal. Always confirm tire compatibility with the wheel manufacturer.
Before starting a tubeless conversion, check whether your tire is designed for tubeless use. Our guide to the best mountain bike tires for trail riding can help you understand the tire options available for different trail conditions.
4. Tubeless Sealant
Liquid sealant helps close small punctures and seal minor air leaks. Different products use different chemical formulations and have different maintenance requirements. Choose a sealant recommended for your tire and rim combination.
5. Installation Tools
Depending on the system, you may need:
- Tire levers approved for your rim and tire.
- A floor pump or compatible tire inflator.
- A valve-core removal tool.
- Cleaning cloths.
- Isopropyl alcohol, if approved for the rim finish and tape adhesive.
- Scissors.
- A sealant injector or measuring container.
- Tire mounting lubricant approved by the tire manufacturer.
A compressor or tire booster may be necessary for some tire and rim combinations. Always follow the equipment manufacturer’s instructions.
How to Convert Compatible MTB Rims to Tubeless at Home
The following process applies to wheels that are already tubeless-ready or have an explicitly manufacturer-approved conversion system. It is not a universal procedure for arbitrary non-tubeless rims.
Step 1: Remove the Wheel and Inner Tube
Remove the wheel from your mountain bike. Release the remaining air from the inner tube and carefully remove the tire using appropriate tire levers. Take out the inner tube and remove any existing rim tape if the conversion instructions require replacement.
Inspect the tire and rim before continuing. If you find cracks, significant dents, damaged bead seats, or other structural problems, stop the conversion.
Step 2: Clean the Rim Bed
The rim bed needs to be clean before installing tubeless tape. Remove dirt, old adhesive, dried sealant, and other contaminants. Use a suitable cleaning method recommended by the rim and tape manufacturers. Allow the rim to dry completely. Even small amounts of dirt or leftover adhesive can prevent rim tape from sticking properly.
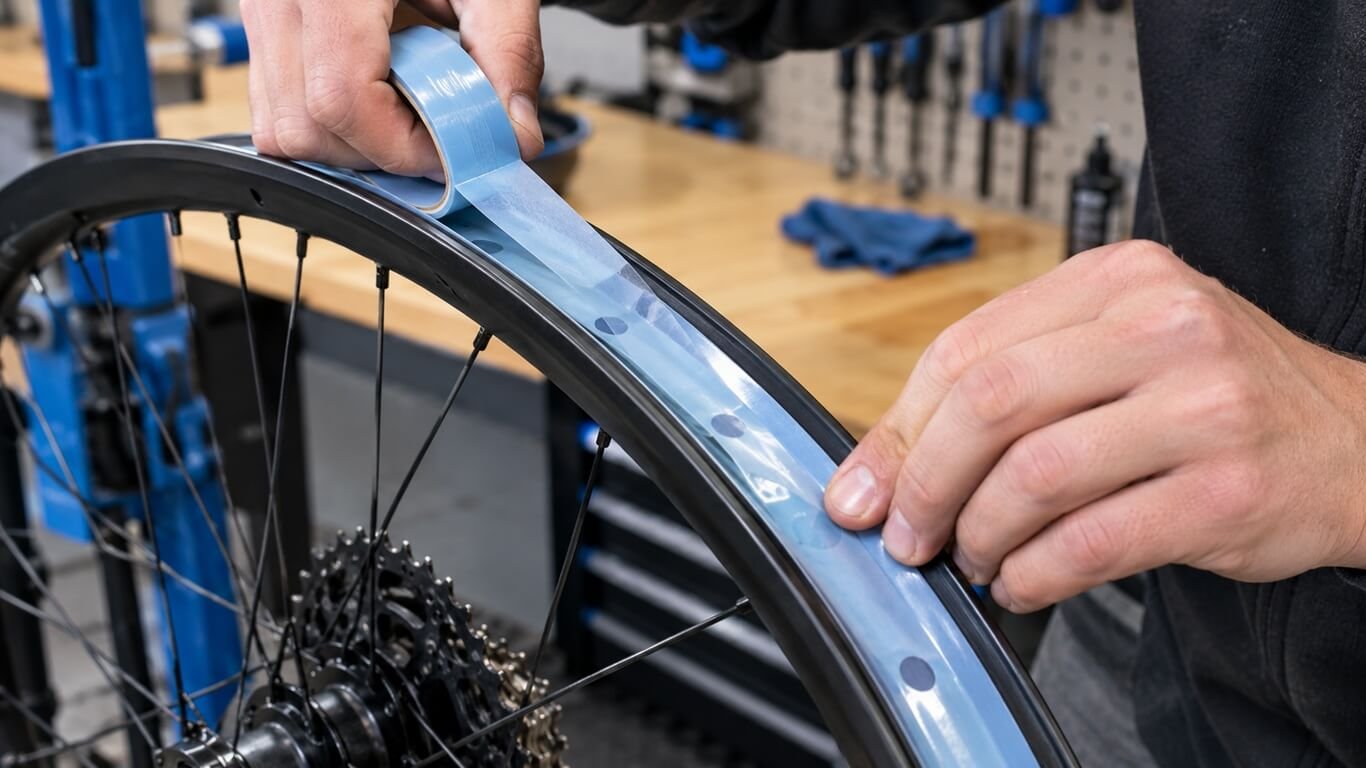
Step 3: Install the Correct Rim Tape or Conversion Strip
For an approved tubeless-ready rim, apply the manufacturer’s recommended tubeless tape. The tape must cover the spoke holes and form a continuous airtight seal. Follow these general principles:
- Confirm the required tape width from the rim manufacturer.
- Begin at the recommended starting position.
- Apply consistent tension without stretching the tape excessively.
- Press the tape firmly into the rim bed.
- Overlap the tape according to the manufacturer’s instructions.
- Check the entire circumference for wrinkles, gaps, or trapped air.
Some wheel manufacturers recommend tape approximately 2 mm wider than the internal rim width, but this is not a universal rule. Always use the specified tape dimensions.
For a conventional rim, use only a dedicated conversion strip or kit approved for that exact rim design. Do not attempt to compensate for an unsuitable rim profile by adding multiple layers of ordinary tape.
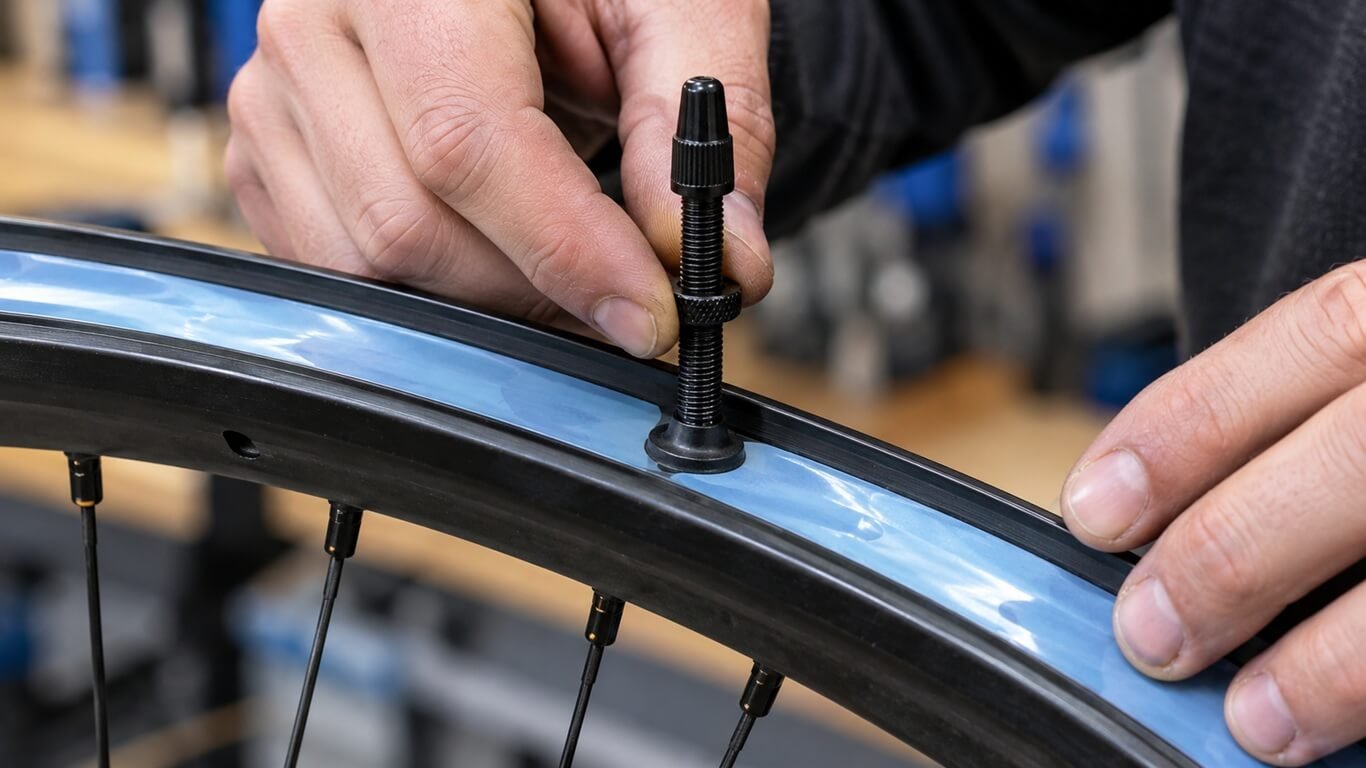
Step 4: Install the Tubeless Valve
Locate the valve opening in the rim tape. Create the valve opening using the method recommended by the tape or conversion-kit manufacturer. Avoid making an unnecessarily large hole because it can compromise the seal.
Insert the compatible tubeless valve and ensure its rubber base sits correctly against the rim bed. Tighten the retaining nut by hand according to the manufacturer’s instructions. Avoid excessive tightening, which can damage the rubber seal or rim tape. Avoid overtightening the valve nut or other wheel components during installation.
For maintenance tasks that require controlled tightening, see our guide to budget torque wrenches for bikes.
Step 5: Mount the Compatible MTB Tire
Check the tire’s rotation direction before installation. Place one tire bead onto the rim and work around the circumference. Install the second bead carefully, following the tire manufacturer’s mounting instructions. Use approved tire-mounting lubricant if recommended.
Do not force the tire onto the rim or use tools that could damage the bead or rim surface. If the tire does not fit correctly, stop and recheck the tire and rim compatibility. Having the right repair equipment makes routine MTB maintenance more manageable.
Our guide to the best mountain bike tools for repairs covers useful tools to keep in your workshop or riding kit.
Step 6: Seat the Tire Bead
Before inflation, make sure both tire beads are positioned correctly. Some combinations can seat with a suitable floor pump, while others require a compatible tire booster or regulated inflation equipment.
Follow the maximum pressure specified by the rim and tire manufacturers. Never exceed the lower applicable limit. Keep your face and body away from the tire during inflation.
As the tire inflates, listen for the bead seating and inspect the molded reference line near the tire bead. It should sit evenly around the rim on both sides. If the bead does not seat properly, stop, release the air, and investigate the problem.
Never use excessive pressure to force a poorly fitting tire into place. A suitable pump can make tire installation easier, particularly when you need sufficient airflow to seat a compatible tire bead. Check our recommendations for the best bike pumps for tubeless tires before choosing your inflation equipment.
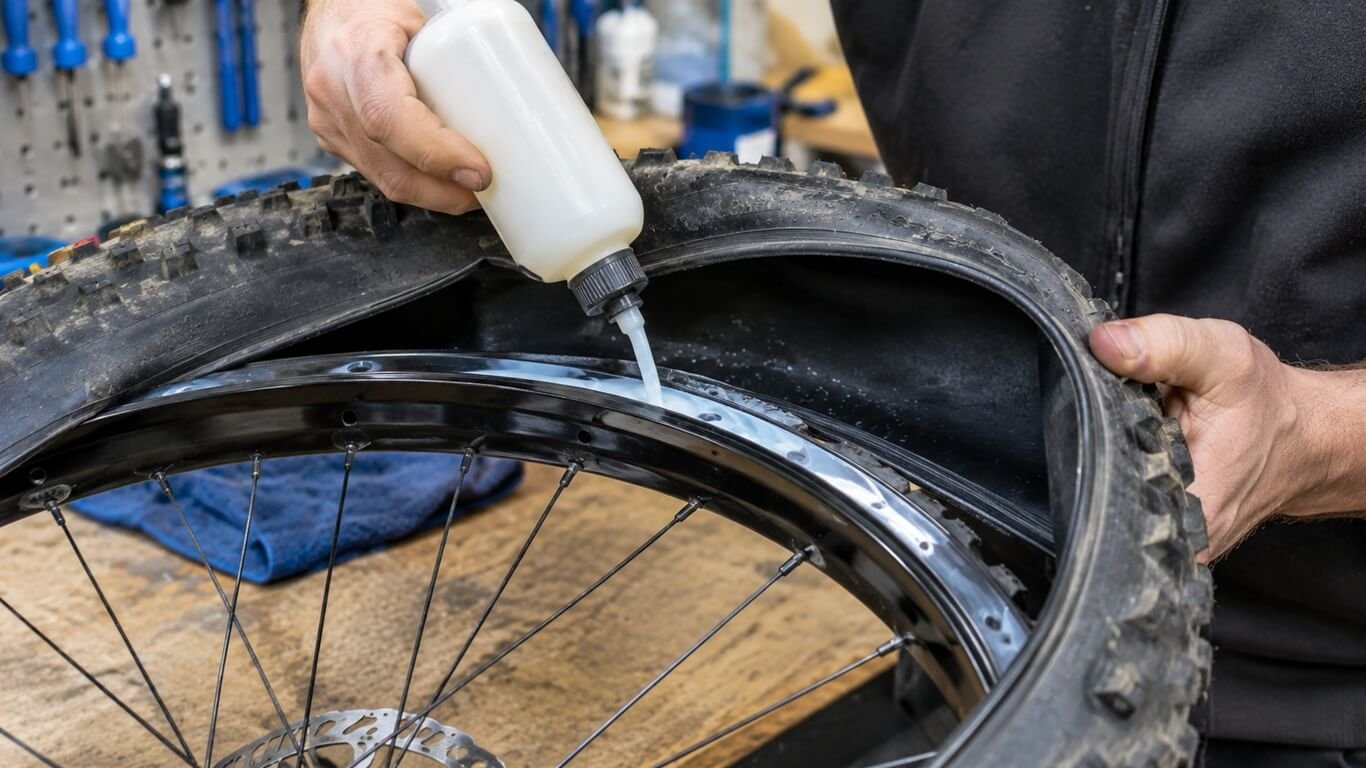
Step 7: Add Tubeless Sealant
Once the tire is correctly seated, release the air according to the sealant manufacturer’s installation procedure. If the valve has a removable core, some systems allow sealant to be injected through the valve stem. Alternatively, the recommended amount can be added directly through the tire bead before the final seating process.
Use the quantity specified for your tire size and sealant product. Do not assume every MTB tire requires the same amount. Reinstall the valve core if removed and inflate the tire using the recommended procedure.
Step 8: Distribute the Sealant
Rotate and gently shake the wheel so the sealant can spread across the inside of the tire. Move the wheel through different positions to help distribute the liquid around the casing and bead area. Inspect both tire sidewalls, the valve area, and the rim bed for leakage.
Small amounts of sealant may escape through minor imperfections during initial setup, but persistent bubbling, visible bead movement, or substantial air loss requires investigation. Do not ride until the tire has seated securely and the system holds pressure reliably.
Step 9: Perform a Final Safety Inspection
Before reinstalling the wheel, check:
- Both tire beads are evenly seated.
- The tire has no bulges or visible damage.
- The valve is secure and not leaking.
- The rim tape remains properly positioned.
- The wheel has no structural damage.
- Tire pressure is within the manufacturer’s limits.
Reinstall the wheel and confirm that the axle, quick-release, or thru-axle is correctly secured. Check that the brakes and wheel are functioning normally. Perform an initial low-speed inspection in a safe area before normal trail riding. Stop immediately if you notice tire movement, pressure loss, unusual noises, or bead instability.
Common MTB Tubeless Conversion Problems and How to Fix Them
Even an approved tubeless setup can experience installation problems. Understanding their causes can help prevent unnecessary damage.
Tire Will Not Inflate
Possible causes:
- Tire beads are not positioned correctly.
- Rim tape is leaking.
- The valve is not sealed properly.
- The tire and rim combination is incompatible.
- The inflation equipment cannot provide the required airflow.
What to do:
Check the tire manufacturer’s seating procedure and inspect the valve and rim tape. If the tire repeatedly fails to seat, stop rather than increasing the pressure beyond the specified limit.
Air Leaks Around the Valve
Possible causes:
- The valve base is not seated correctly.
- The valve seal is damaged.
- The tape opening is too large.
- The rim bed has an uneven surface.
What to do:
Release the air and inspect the valve assembly. Replace damaged components and reinstall the valve according to the manufacturer’s instructions.
Sealant Leaks Around the Tire Bead
Possible causes:
- The tire bead is not seated correctly.
- The rim tape or conversion strip is leaking.
- The tire and rim are incompatible.
- The rim or tire has damage.
What to do:
Do not ride while the tire is losing significant air or showing signs of bead instability. Check the entire bead area and verify that the tire and rim combination is approved.
Tire Keeps Losing Pressure
Possible causes:
- Incomplete sealing during initial installation.
- A damaged valve.
- A puncture larger than the sealant can repair.
- Dried-out sealant.
- Air leakage through the rim bed or tire casing.
What to do:
Inspect the tire, valve, and rim carefully. Check the sealant condition and replenish it according to the manufacturer’s maintenance recommendations. If air continues escaping, have the setup inspected by a qualified bicycle mechanic.
After muddy rides, clean the tire and wheel carefully to prevent dirt buildup around the rim and valve area. Explore the best mountain bike cleaning kits covers equipment for keeping your bike in good condition.
Tire Burps During Hard Cornering
Burping occurs when air escapes between the tire bead and rim during riding. It can result from:
- An incompatible tire and rim combination.
- An unsuitable rim profile.
- Incorrect tire pressure.
- An improperly seated bead.
- Damaged or contaminated bead surfaces.
Burping can cause sudden pressure loss and loss of control. Stop riding if this occurs. Do not try to solve a compatibility problem simply by adding more sealant.
When You Should NOT Convert Standard MTB Rims to Tubeless
There are situations where attempting a conversion is not worth the risk. Avoid a DIY conversion when:
- The rim manufacturer explicitly prohibits tubeless use.
- No approved conversion kit exists for the rim.
- The rim has cracks, dents, or damaged bead seats.
- The tire is not approved for the rim.
- The tire bead does not fit securely.
- The wheel uses an incompatible or damaged rim profile.
- The conversion depends on improvised tape or an unverified sealant arrangement.
Older conventional rims sometimes require specially designed conversion strips. However, the availability of an aftermarket strip does not automatically mean it is safe for every rim. For example, Stan’s NoTubes explains that ordinary tape-and-valve conversion is intended for tubeless-ready rims.
It also describes the limitations of older conventional rim conversion systems. If the manufacturer cannot confirm compatibility, using a traditional inner tube is the safer option.
Benefits of Converting an MTB to Tubeless
When the wheel, tire, and conversion components are compatible, tubeless technology offers several advantages.
1. Reduced Pinch Flats
Without an inner tube, the traditional pinch-flat problem caused by trapping the tube between the tire and rim is eliminated. However, tubeless tires can still suffer casing damage, sidewall cuts, and rim impacts.
2. Better Trail Comfort
A suitable tubeless setup can allow riders to use lower tire pressures within the manufacturer’s recommended limits. This can improve traction and help the tire conform to uneven trail surfaces.
3. Automatic Sealing of Small Punctures
Sealant can close many small punctures before the rider notices significant air loss. Its effectiveness depends on the puncture size, sealant condition, tire construction, and riding conditions.
4. Improved Traction
Lower suitable pressures can increase the tire’s contact with the ground. This will improve grip when climbing, cornering, and riding over loose surfaces.
5. Potential Weight Savings
Removing inner tubes can reduce rotating wheel weight. However, the amount saved depends on the original tubes, tire construction, sealant quantity, valves, and rim tape.
Disadvantages of Tubeless MTB Tires
Tubeless systems are not maintenance-free.
1. More Complicated Installation
Initial installation can require additional equipment, careful preparation, and troubleshooting.
2. Regular Sealant Maintenance
Sealant gradually dries out and needs periodic inspection and replacement. The interval depends on the sealant product, climate, tire conditions, and riding frequency.
3. More Difficult Repairs in Some Situations
Larger punctures require a tubeless tire plug or an internal patch. Severe tire damage may still require an inner tube or tire replacement.
4. Higher Initial Cost
Tubeless valves, tape, sealant, compatible tires, and conversion kits add to the initial expense. Although upgrading your wheel setup can improve puncture resistance and trail convenience, suspension also plays an important role in riding comfort and control. Explore our guide to the best mountain bike forks if you’re planning a broader MTB upgrade.
5. Compatibility Limitations
Not every rim and tire combination can safely operate without an inner tube. This is particularly important when upgrading older or budget mountain bikes.
Is It Better to Convert Your Existing Wheels or Buy Tubeless-Ready Wheels?
The best option depends on the condition of your existing wheels and whether a manufacturer-approved conversion system exists.
| Situation | Recommended option |
|---|---|
| Existing rim is tubeless-ready | Convert using compatible components |
| Conventional rim has an approved conversion kit | Consider the approved kit |
| Manufacturer does not approve conversion | Continue using inner tubes |
| Rim is damaged or worn | Replace the wheel or rim |
| No reliable compatibility information exists | Consult the manufacturer or a mechanic |
| You regularly ride demanding trails | Consider a purpose-built tubeless-ready wheelset |
For riders who regularly tackle technical trails, investing in a properly designed tubeless-ready wheelset offers better long-term reliability than experimenting with an older conventional rim. The additional cost can be worthwhile when safety, bead retention, and consistent performance are priorities.
How to Maintain Your MTB Tubeless Setup
After a successful conversion, regular maintenance helps keep the system reliable.
- Check tire pressure before rides: Tubeless tires can gradually lose air, so check pressure using a suitable gauge.
- Inspect sealant regularly: Follow the sealant manufacturer’s recommendations for checking and replenishing the liquid.
- Look for tire damage: Check the tread, sidewalls, and bead area for cuts, cracks, and embedded debris.
- Inspect the valves: Keep the valve area clean and make sure the valve is not loose or leaking.
- Monitor rim tape condition: If you remove the tire for maintenance, inspect the tape for lifting, wrinkles, damage, or contamination.
- Carry emergency repair equipment: A tubeless plug kit, spare inner tube, tire levers, and portable pump can help you handle trailside punctures.
Even with sealant, a tubeless system cannot prevent every flat tire. Being prepared is still important.
FAQs About Converting Non-Tubeless MTB Rims to Tubeless
Can I convert any non-tubeless MTB rim to tubeless?
No. Some conventional rims can work with specific manufacturer-approved conversion systems, but many cannot be converted safely. Check the rim manufacturer’s compatibility information before attempting the installation.
Can I use regular rim tape for a tubeless conversion?
No. Ordinary rim tape is not necessarily airtight, durable, or compatible with tire sealant. Use the specified tubeless tape or an approved conversion strip.
Do I need tubeless-ready tires?
For a reliable tubeless setup, use tires specifically approved for tubeless operation with your rim. Conventional tube-type tires may not have the correct bead construction.
Riders who regularly switch between paved surfaces and off-road routes should also consider the right tire construction and tread pattern. See our guide to the best mountain bike tires for road and trail for more options.
Can I convert a 26-inch MTB rim to tubeless?
Wheel diameter alone does not determine compatibility. Some older 26-inch wheels have approved conversion systems, while others do not. Check the exact rim model and compatible tire specifications.
Can I install tubeless tires without sealant?
Some specialized systems can operate without liquid sealant, but most modern MTB tubeless setups use sealant for puncture protection and sealing minor leaks. Follow the tire and wheel manufacturers’ recommendations.
How much sealant should I use in an MTB tire?
The correct quantity depends on tire size, casing construction, and sealant formulation. Follow the product manufacturer’s dosage instructions rather than using a universal amount.
How long does tubeless sealant last?
There is no single maintenance interval for every sealant. Temperature, humidity, riding conditions, and product formulation influence how quickly it dries. Check the manufacturer’s recommended inspection and replenishment schedule.
Can I put an inner tube back into a tubeless-ready MTB rim?
Yes, provided the tire and rim are compatible with conventional tube use. Inspect the rim tape and ensure that the tube is not damaged by the valve opening or other components.
Is tubeless better than using inner tubes for mountain biking?
Tubeless can reduce pinch flats, provide additional puncture protection, and allow suitable lower pressures. Inner tubes are generally simpler and less expensive to maintain. The best choice depends on your riding style, equipment, and maintenance preferences.
What should I carry for a tubeless MTB Tire emergency?
Carry a spare inner tube, tire levers, a suitable pump, and a tubeless plug kit. A spare valve core and a small sealant container can also be useful for longer rides.
If you’re considering upgrading your bike instead of replacing individual components, check out the best mountain bikes of 2026 and compare options for different riding styles and budgets.
Final Verdict: Should You Convert Your Non-Tubeless MTB Rims?
Converting a conventional MTB wheel to tubeless can be possible, but compatibility must come before convenience. A manufacturer-approved conversion system, a compatible tire, suitable sealing components, and correct installation procedures are essential. Simply adding rim tape, a valve, and sealant is not enough to make an unsuitable rim safe.
If your existing wheels are approved for conversion, a carefully completed DIY installation can provide the benefits of tubeless riding without immediately purchasing a new wheelset. However, if your rim manufacturer does not approve tubeless use, continuing with inner tubes or upgrading to a purpose-built tubeless-ready wheelset is the better decision.
The most important rule is simple: Never compromise tire-bead security for the sake of converting your wheels at home.