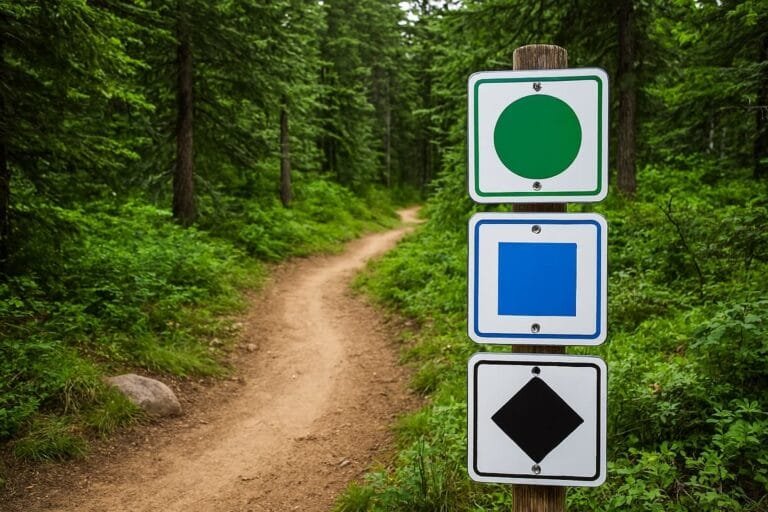
How to Read the Perfect Trail Line on Your MTB
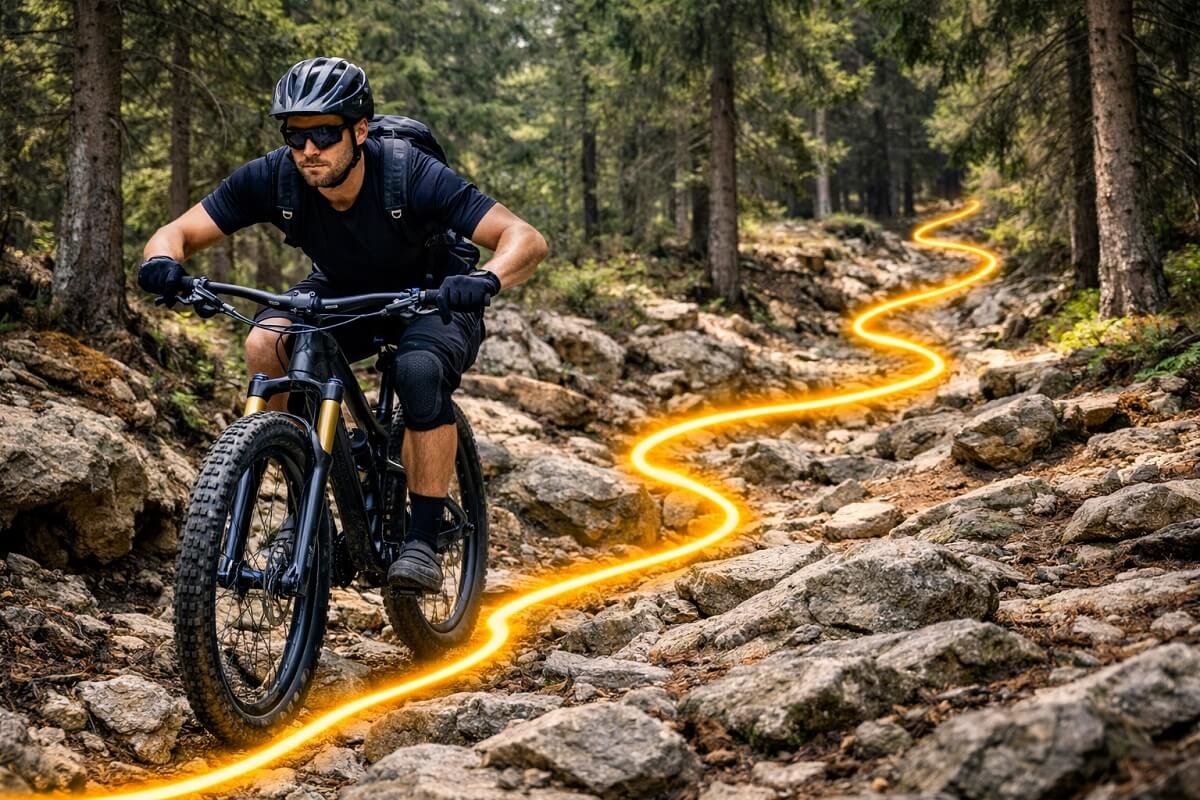
Mountain biking is not only about speed or strength. The riders who move smoothly through rock gardens, tight switchbacks, and root-covered trails all share one skill: they know how to read the trail line. A trail line is the path you choose to ride through obstacles. The right line allows your bike to maintain traction, momentum, and balance. The wrong line forces harsh braking, sudden impacts, and wasted energy.
Many beginners focus heavily on upgrading components or riding harder terrain. In reality, line choice often makes a bigger difference than equipment. Riders who understand trail reading can flow through sections that look intimidating to others.
Learning this skill takes practice, observation, and a basic understanding of how terrain affects traction and suspension behavior. Riders using modern trail bikes or even those listed in guides like 10 Best Mountain Bikes to Dominate 2026 Trails will benefit greatly once they develop this ability.
This guide explains how to read a trail line effectively. You will learn how to analyze terrain, choose smoother paths, maintain speed through obstacles, and improve confidence on technical sections.
What Is a Trail Line in Mountain Biking?
A trail line is the route your tires follow across a section of terrain. It determines how your bike interacts with rocks, roots, berms, drops, and corners. There is rarely a single perfect line. Instead, riders often choose between multiple options depending on their skill level, bike setup, and speed.
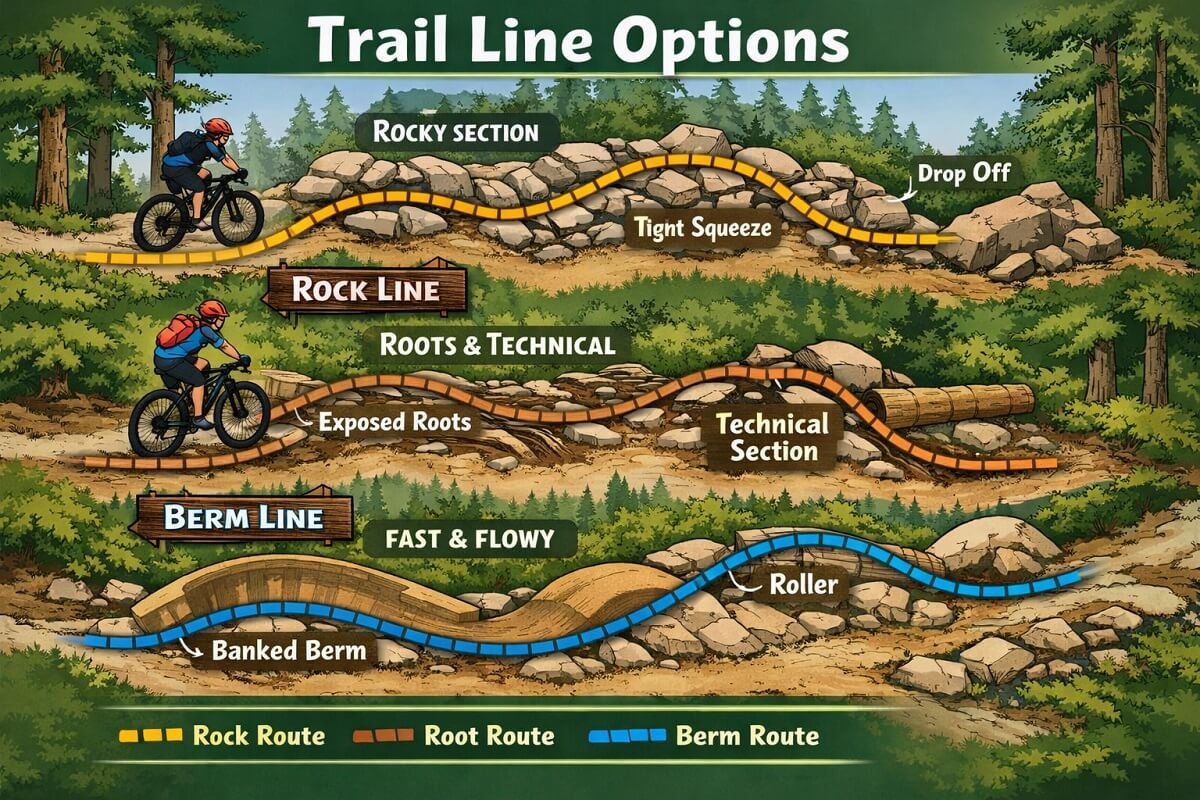
Practical Examples of Trail Line Choices
Experienced riders quickly scan the terrain and choose the line that balances speed, traction, and safety.
| Terrain Feature | Possible Line Options | Result |
| Rock garden | Straight line over rocks | Faster but rougher |
| Rock garden | Zig-zag around rocks | Slower but smoother |
| Corner | Wide entry → tight exit | Maximum speed |
| Root section | Direct line over roots | Requires good balance |
| Root section | Side path around roots | Safer for beginners |
Why Reading Trail Lines Matters?
Understanding trail lines dramatically improves your riding performance. Riding the correct trail line not only improves speed and control but also helps protect the trail surface. Choosing smoother paths and avoiding unnecessary skidding reduces erosion and damage to natural terrain.
Trail riding guidelines from the International Mountain Bicycling Association emphasize that proper line choice supports both rider safety and sustainable trail use.
Key Benefits
- Better traction: Choosing smoother surfaces keeps tires planted and prevents sliding.
- Increased speed: Efficient lines reduce unnecessary braking and maintain momentum.
- Less fatigue: Riding smoother terrain absorbs fewer impacts.
- Improved suspension performance: When your line avoids harsh impacts, your suspension works more effectively. Riders who properly tune sag using guides like Dial Your MTB Sag Like a Pro often notice this difference immediately.
- Greater confidence: Knowing how to analyze terrain reduces hesitation.
Key Terrain Features to Analyze
Every trail contains visual clues that reveal the best line.
1. Rocks
Large rocks disrupt wheel movement and slow momentum.
Look for:
- gaps between rocks
- smoother edges
- flat landing surfaces
Avoid hitting sharp edges at slow speeds.
2. Roots
Roots become slippery when wet. The best line usually crosses them at a perpendicular angle. Avoid riding along the length of roots because tires may slide.
3. Berms
Berms support higher cornering speeds.
Ideal line:
Wide entry → apex → wide exit
This technique allows the bike to maintain traction.
4. Loose Gravel
Loose sections reduce grip. Look for compact soil or areas where other riders have already compressed the trail.
5. Drops and Ledges
Approach drops with enough speed to roll smoothly rather than stopping suddenly. Scanning ahead helps prepare body position before impact.
Trail Line Comparison Chart
Choosing the correct line depends on terrain, speed, and rider ability. Different lines can significantly change your riding experience.
| Line Type | Difficulty | Speed | Control | Best For |
| Direct line | High | Fast | Lower | Advanced riders |
| Smooth bypass | Low | Moderate | High | Beginners |
| High outside line | Medium | Fast | Medium | Cornering |
| Inside tight line | Medium | Slower | High | Technical turns |
| Pump line | Medium | Fast | High | Flow trails |
Step-by-Step Method to Read Trail Lines
Step 1: Look Ahead
New riders often stare directly at their front wheel. Instead, scan 10–20 feet ahead on the trail. This allows time to choose a line before reaching obstacles.
Step 2: Identify Smooth Terrain
Smooth surfaces maintain traction and momentum.
Watch for:
- compact dirt
- worn tire paths
- natural flow of the trail
These areas usually indicate the most efficient line.
Step 3: Plan Entry and Exit
The best line often begins before the obstacle.
For example:
- enter wide before a corner
- position wheels between rocks
- prepare body position before roots
Thinking ahead ensures smooth transitions.
Step 4: Maintain Momentum
- Stopping suddenly can destabilize the bike.
- Try to maintain consistent speed through obstacles.
- Momentum allows suspension to absorb impacts more efficiently.
Step 5: Commit to the Line
Hesitation can lead to mistakes.
Once you select a line:
- focus forward
- stay balanced
- keep pedaling or coasting smoothly
Confidence improves accuracy.
How Suspension Setup Affects Line Choice
Bike setup influences which lines are practical.
Suspension Sag
Proper sag improves wheel contact with the ground.
Benefits include:
- smoother rock absorption
- improved traction
- better cornering stability
If sag is too stiff, rough terrain feels harsh. If too soft, the bike loses efficiency.
Fork Travel
Long-travel forks allow riders to take more aggressive lines through rock gardens. Shorter travel setups may require smoother paths.
Tire Pressure
Lower tire pressure increases grip but risks rim strikes. Higher pressure rolls faster but reduces traction. Finding the correct balance helps riders maintain control through technical terrain.
Visual Line Strategy Table
| Trail Situation | Recommended Line | Why It Works |
| Rock gardens | Smooth gaps between rocks | Reduces impact |
| Tight corners | Wide entry and exit | Maintains speed |
| Root sections | Cross roots at angle | Improves traction |
| Loose gravel | Hard-packed dirt | Better grip |
| Steep descents | Smooth flowing line | Improves control |
Common Trail Line Mistakes
Many riders struggle because of simple errors.
Looking Too Close
- Fixating on the front tire prevents reading upcoming terrain.
- Always look ahead.
Braking in Corners
Heavy braking inside corners causes loss of traction.
Instead:
- brake before entering
- release brakes during the turn
Choosing the Straightest Path
- The shortest route is not always the fastest.
- Sometimes a curved or wider path avoids obstacles and maintains speed.
Ignoring Terrain Flow
- Trails are often designed with natural flow.
- Follow the shape of the trail rather than fighting it.
Beginner vs Advanced Line Strategy
Skill level changes how riders approach obstacles.
| Skill Level | Line Preference | Strategy |
| Beginner | Smooth bypass | Focus on stability |
| Intermediate | Balanced lines | Maintain momentum |
| Advanced | Direct lines | Maximize speed |
| Expert | Technical lines | Attack obstacles |
- Expert Tips: Beginners should prioritize control and safety before attempting aggressive routes.
Training Exercises to Improve Line Reading
Practice helps develop instincts.
Trail Scanning Drill
While riding easy trails:
- constantly scan ahead
- predict the best line
- compare with your actual path
This improves visual analysis.
Slow Technical Riding
- Practice riding slowly through obstacles.
- This builds balance and precision.
Follow Experienced Riders
- Observing skilled riders helps reveal effective line choices.
- Watch how they approach corners and rock sections.
Walk the Trail
- Before riding difficult trails, walk sections and analyze the terrain.
- Many professional riders use this method during competitions.
Practicing trail analysis and technical riding drills can significantly improve your ability to choose better lines. Many professional coaching programs also emphasize vision control, body positioning, and terrain awareness as key riding skills. Training resources from USA Cycling highlight how structured practice and skill drills help riders develop better control and trail awareness.
How Professional Riders Choose Lines
Elite riders evaluate trails quickly using several principles.
Efficiency
- Pros minimize unnecessary movement.
- Their lines maintain consistent speed and traction.
Terrain Flow
- They follow the natural contour of the trail.
- This reduces energy loss.
Risk Management
- Pros evaluate risk carefully.
- A slightly slower line may reduce crash probability during races.
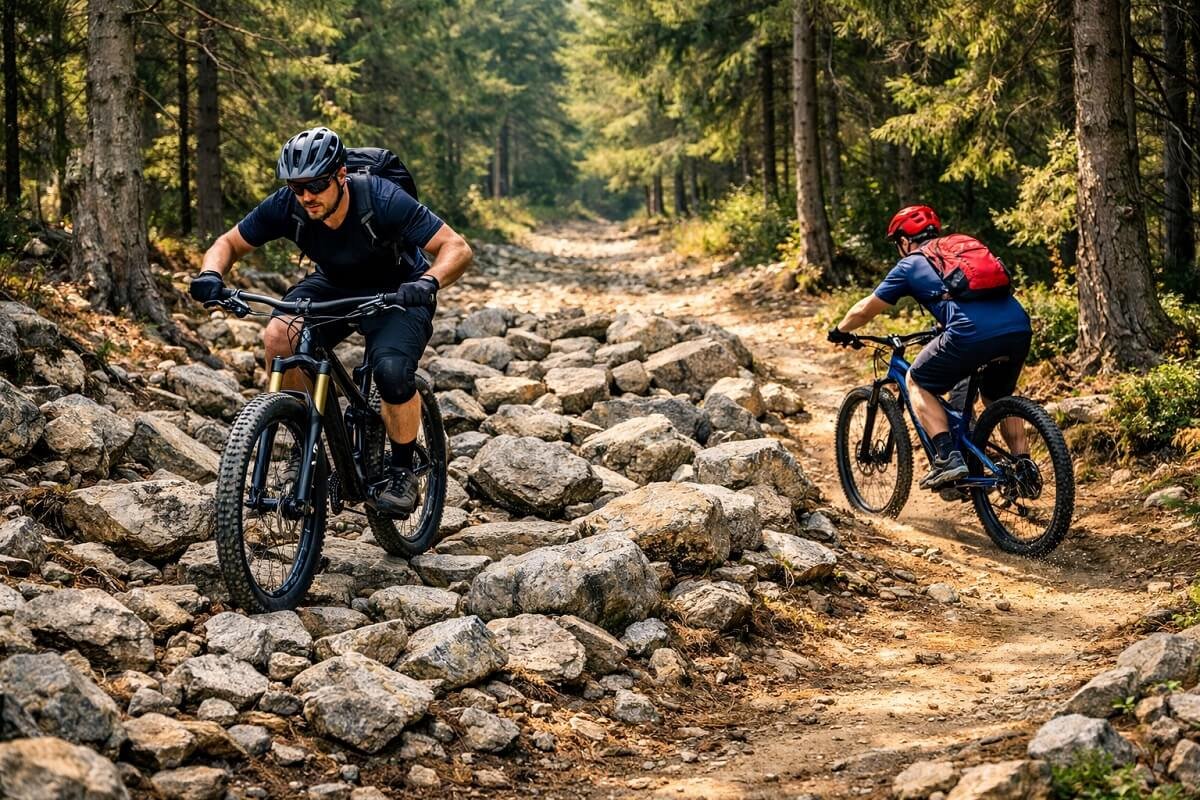
How to Read Trail Lines in Rock Gardens
Rock gardens are one of the most challenging obstacles in mountain biking. Riders often slow down too much and lose momentum before entering the section. The key is to scan the terrain early and identify gaps between larger rocks. Instead of focusing on each individual rock, try to visualize a smooth path that connects stable landing points.
A good rock garden line often follows slightly raised sections where tires avoid deep holes or sharp edges. Riders with well-tuned suspension and proper sag can maintain better control when the bike absorbs impacts efficiently. Keeping your weight centered and allowing the bike to move underneath you also helps maintain traction.
How to Choose the Best Line in MTB Corners
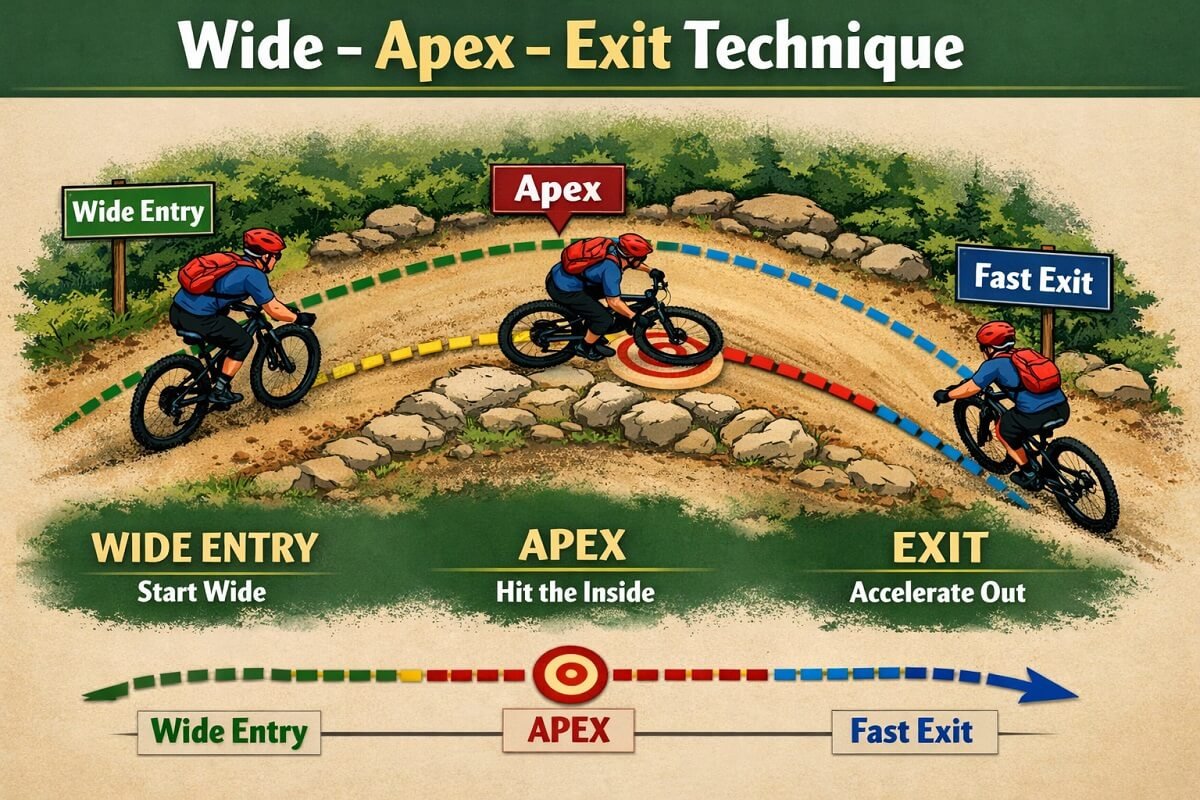
Cornering is where trail line choice becomes extremely important. Entering a corner with the correct line allows riders to maintain speed and traction without excessive braking.
The ideal cornering line usually follows a wide entry, tight apex, and wide exit pattern. This shape increases the turning radius and keeps the bike stable. Riders should brake before entering the corner rather than during the turn.
Look for berms or packed dirt that provide natural support. Avoid loose gravel or exposed roots in the middle of the turn. Positioning the bike correctly before the corner allows smoother acceleration once exiting the turn. Experienced riders often scan several corners ahead while descending fast trails. This habit helps anticipate terrain changes and maintain consistent flow.
How to Read Trail Lines on Technical Descents
Technical descents require fast decision making and precise line selection. Riders must balance speed with control while navigating obstacles such as rocks, drops, and loose surfaces.
The most effective strategy is to look far down the trail and identify a continuous path rather than focusing on individual obstacles. This approach allows riders to maintain flow through complex terrain.
Body position also plays a major role. Keeping hips low and weight centered improves stability when riding steep sections. Suspension performance becomes critical during descents because impacts occur more frequently.
Many riders who upgrade components like modern forks or trail bikes—often recommended in guides such as MTB Knee Pads with Hard Shell Protection—notice improved control when tackling aggressive downhill lines. Choosing a smoother but slightly longer line can often be faster than attempting a direct route through rough terrain.
Final Thoughts
Reading the perfect trail line is one of the most valuable skills in mountain biking. Riders who master this ability move through trails smoothly, conserve energy, and maintain better control. Instead of reacting to obstacles at the last second, skilled riders anticipate terrain and plan their route ahead of time. This proactive approach reduces mistakes and builds confidence.
Improving line reading takes practice. Spend time scanning trails, experimenting with different paths, and observing how experienced riders approach technical sections. With consistent practice and proper bike setup, you will start noticing smoother rides, faster descents, and greater confidence on challenging terrain.
Frequently Asked Questions
What is the best trail line in mountain biking?
The best trail line is the path that allows your bike to maintain traction, momentum, and control while minimizing unnecessary obstacles. In many cases, the smoothest line is faster than the shortest route because it reduces braking and impact forces.
How far ahead should you look on a mountain bike trail?
Experienced riders typically scan 10 to 20 feet ahead on technical trails and even farther on fast descents. Looking ahead gives you enough time to evaluate terrain and choose the safest and most efficient line.
Is the straightest trail line always the fastest?
Not always. A straight line may include rocks, roots, or loose terrain that slow the rider down. A slightly curved line that avoids obstacles can often maintain higher speed and smoother momentum.
How does suspension setup affect trail line choice?
Proper suspension setup helps absorb impacts and maintain traction. When sag and rebound are tuned correctly, riders can confidently take more direct lines through rough terrain without losing control.
Do professional mountain bikers always take the most technical line?
Professional riders choose lines based on speed and risk. Sometimes a safer and smoother line is faster than a highly technical route, especially during long races where consistency matters.