The Complete Trail Camera Guide (2027): From Basics to Advanced Hunting Strategies

Trail cameras have become one of the most valuable tools for hunters, wildlife enthusiasts, landowners, and conservationists. Whether you’re scouting mature bucks before the season, monitoring turkey activity, keeping an eye on predators, or simply observing wildlife on your property, a quality trail camera provides insights that would otherwise be impossible to gather.
Modern trail cameras have evolved far beyond simple motion-activated cameras. Today’s models feature ultra-fast trigger speeds, high-resolution photos and 4K video, cellular connectivity, AI-powered animal recognition, GPS tracking, cloud storage, solar charging, and advanced security features. Choosing the right camera—and knowing how to use it effectively—can significantly improve your scouting success while saving time and reducing unnecessary trips into the field.
This comprehensive trail camera guide explains everything you need to know about trail cameras, from understanding how they work to selecting the right features, optimizing camera placement, extending battery life, protecting your equipment, and using advanced strategies throughout the hunting season.
Table of Contents
What Is a Trail Camera?
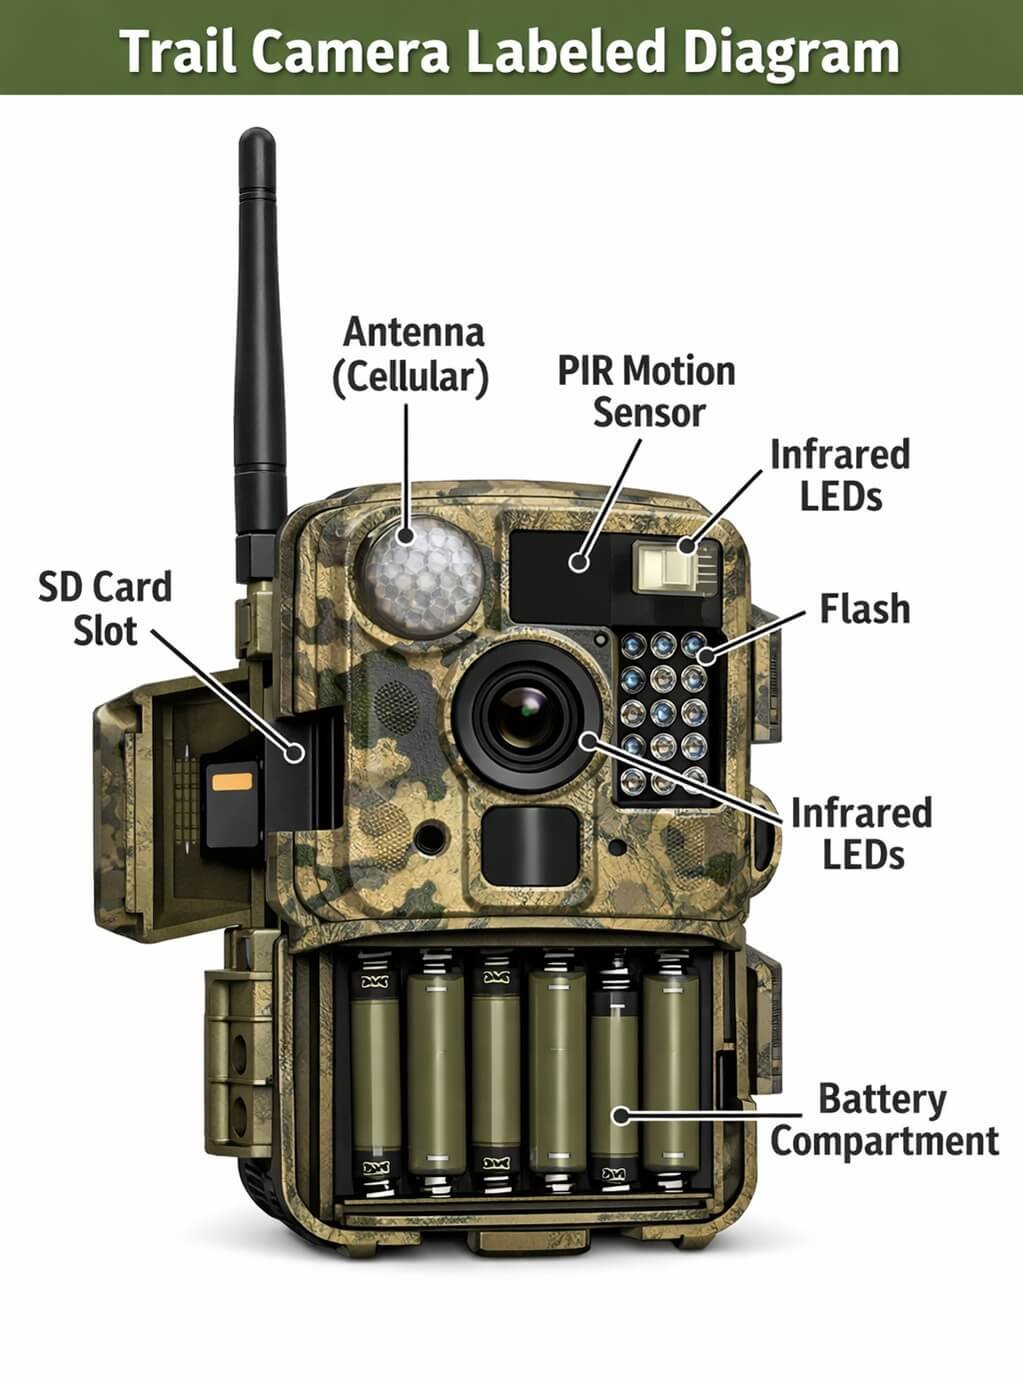
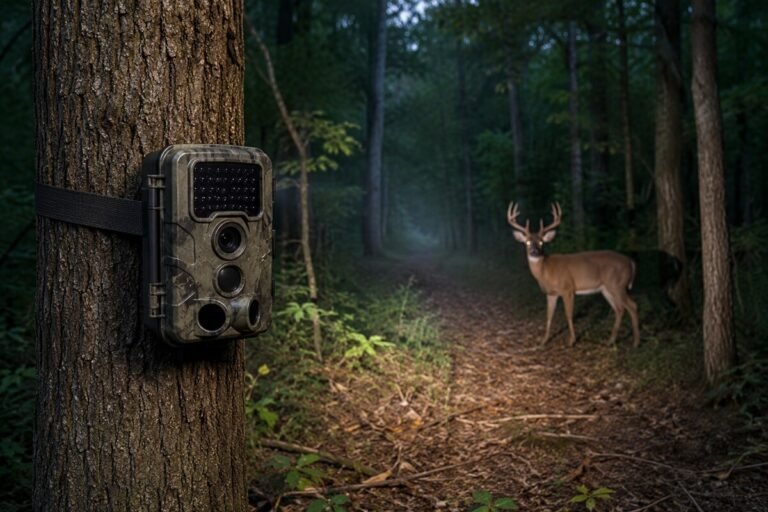
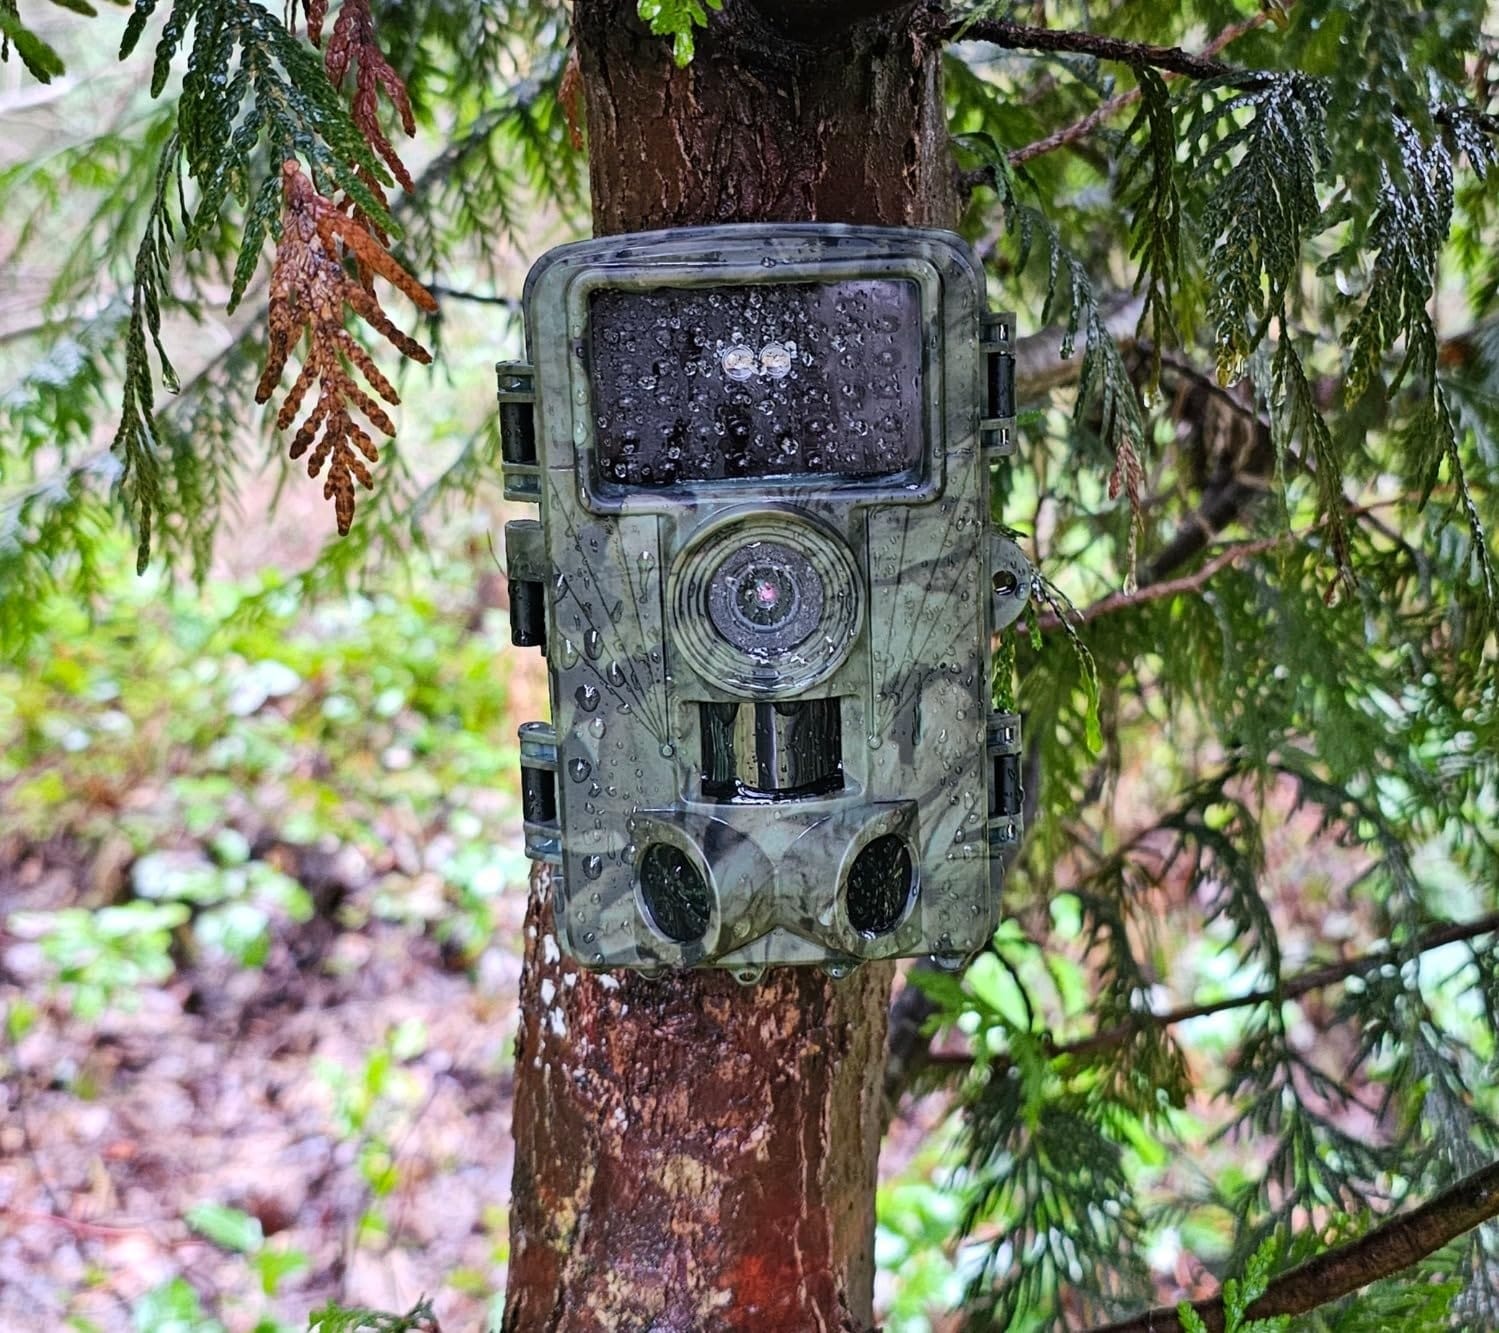
A trail camera—also called a game camera, scouting camera, or wildlife camera—is a weatherproof, motion-activated camera designed to automatically capture photos or videos whenever animals or people pass within its detection zone.
Compared to traditional cameras that require a person to press the shutter button, trail cameras remain in the field for weeks or even months, operating independently using batteries, solar power, or external battery packs. Built-in infrared sensors detect movement and body heat, triggering the camera instantly without disturbing nearby wildlife.
Originally developed primarily for hunters scouting deer movement, trail cameras are now widely used for:
- Deer scouting
- Turkey scouting
- Monitoring bear activity
- Predator management
- Wildlife photography
- Property surveillance
- Farm and ranch monitoring
- Scientific research
- Habitat management
- Wildlife population surveys
Their versatility makes them an essential tool for anyone interested in understanding animal behavior over extended periods.
Why Trail Cameras Matter
Successful hunting is built on information. Instead of relying solely on fresh tracks, rubs, scrapes, or personal observation, trail cameras provide continuous monitoring around the clock—even when you’re not present.
Benefits include:
- Identifying travel routes
- Understanding feeding patterns
- Monitoring water sources
- Tracking mature bucks
- Estimating herd size
- Identifying predator activity
- Determining peak movement times
- Monitoring seasonal behavior changes
- Evaluating habitat improvements
Instead of hunting blindly, trail cameras allow hunters to make data-driven decisions based on actual wildlife movement.
How Trail Cameras Work
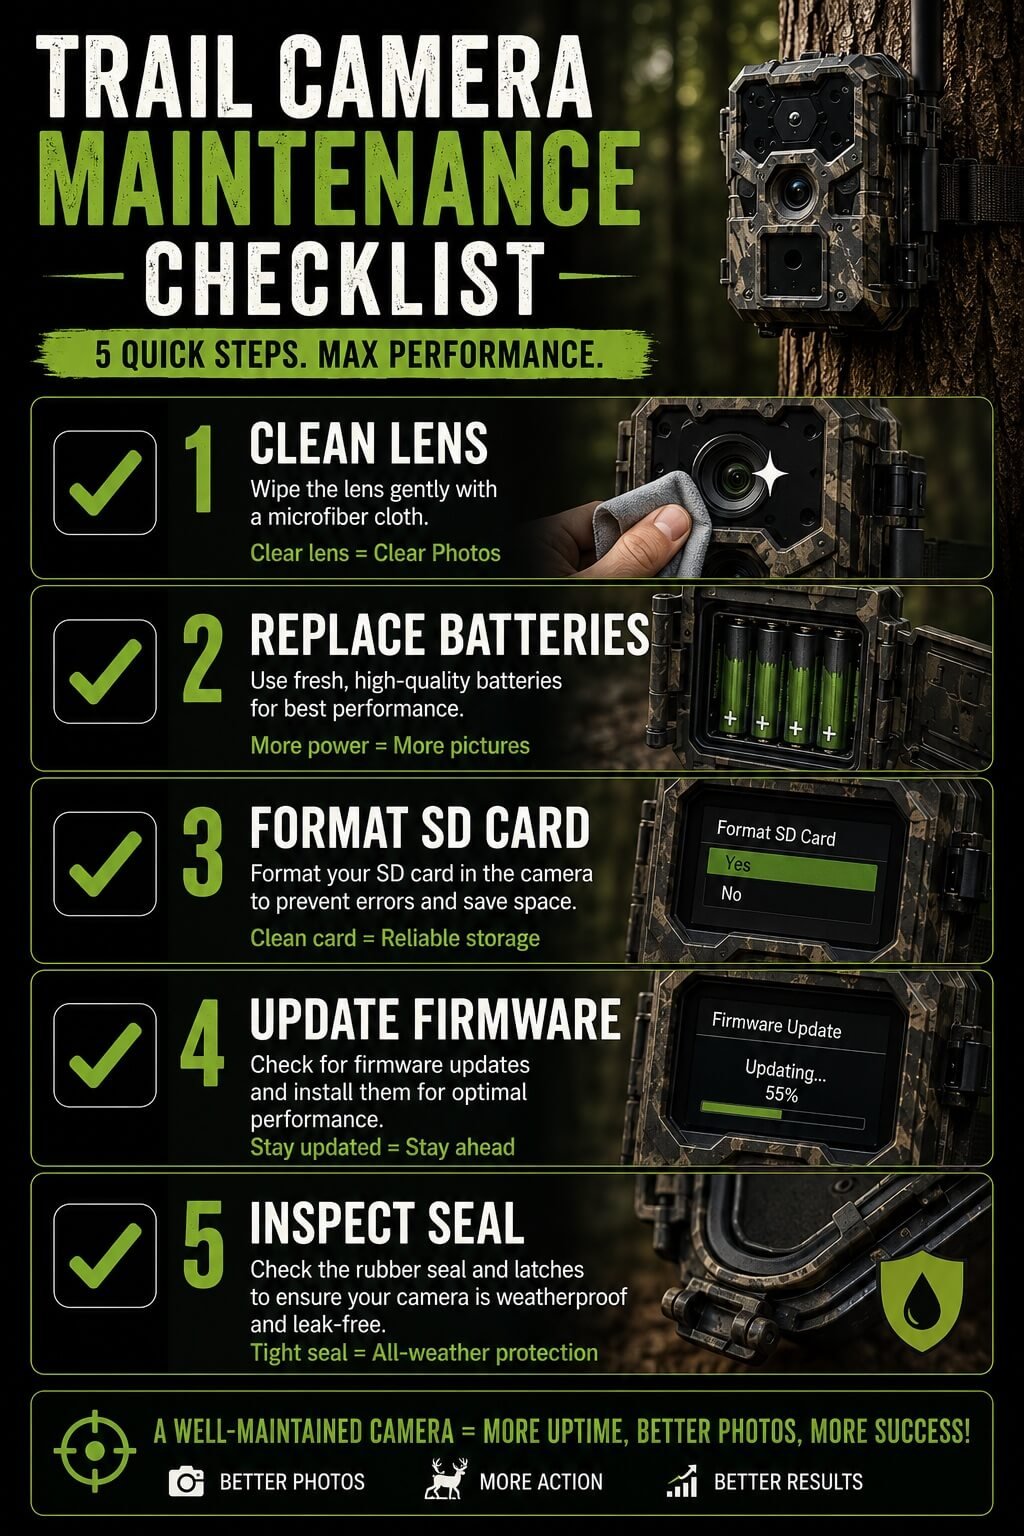
Although modern trail cameras include advanced technology, their operating principle is surprisingly straightforward. Every trail camera combines four primary systems that work together automatically.
1. Passive Infrared (PIR) Motion Sensor
The PIR sensor continuously monitors temperature changes within its field of view. When a warm-bodied animal passes in front of the sensor, the sudden temperature difference triggers the camera almost instantly. The effectiveness of the PIR sensor depends on several factors:
- Animal size
- Movement speed
- Ambient temperature
- Sensor sensitivity
- Distance from the camera
This is why deer walking broadside often trigger cameras more reliably than animals moving directly toward them.
2. Camera Sensor
Once motion is detected, the image sensor captures either:
- Still photographs
- Burst photos
- Time-lapse images
- HD video
- Full HD video
- 2K or 4K video (premium models)
Higher-quality image sensors generally produce better color accuracy, improved low-light performance, and sharper details.
3. Processor
The processor acts as the camera’s brain. It handles:
- Motion detection
- Image processing
- Video encoding
- Date and time stamps
- Moon phase data
- Temperature recording
- GPS coordinates (select models)
- AI species recognition (newer cameras)
- Cellular transmission
More powerful processors also reduce shutter lag and improve recovery time between captures.
4. Storage System
Captured images are stored on:
- SD cards
- microSD cards (some cameras)
- Internal memory (rare)
- Cloud storage (cellular cameras)
Most hunters use high-quality SD cards ranging from 32 GB to 128 GB depending on image resolution and recording frequency.
Motion Detection vs Time-Lapse Mode
Most trail cameras support two primary capture modes.
Motion Detection
The camera records only when movement activates the PIR sensor.
Best for:
- Deer trails
- Funnels
- Scrapes
- Feeders
- Water sources
Advantages include:
- Conserves battery life
- Uses less storage
- Captures actual animal activity
- Minimal empty images
Time-Lapse Mode
The camera captures images at fixed intervals regardless of movement.
For example:
- Every 30 seconds
- Every minute
- Every five minutes
- Every fifteen minutes
This mode is useful for:
- Large agricultural fields
- Food plots
- Open meadows
- Habitat monitoring
- Construction monitoring
Some premium cameras combine motion detection and time-lapse for maximum coverage.
How Fast Does a Trail Camera React?
When an animal enters the detection zone, several events occur within fractions of a second:
- PIR sensor detects movement.
- Processor confirms the trigger.
- Camera wakes from standby.
- Image sensor captures the photo.
- Image is processed.
- File is saved to storage.
- Cellular models upload the image (if enabled).
- Camera returns to standby.
The time between motion detection and image capture is known as trigger speed, one of the most important performance specifications discussed later in this guide.
Types of Trail Cameras
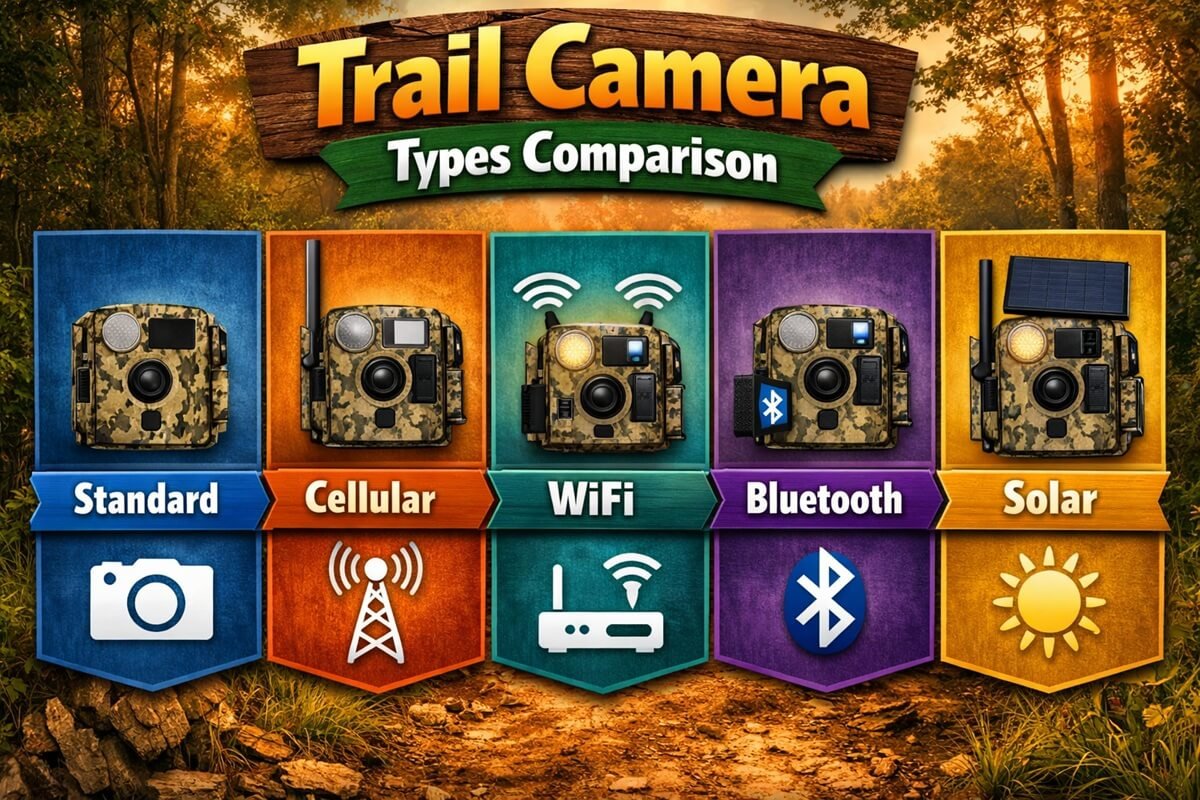
Not all trail cameras are built for the same purpose. Choosing the right type depends on where you’ll use it, how often you can check it, your budget, and the species you’re monitoring. Understanding the strengths and limitations of each category will help you invest in a camera that matches your scouting goals.
Standard (Non-Cellular) Trail Cameras
Standard trail cameras save photos and videos directly to an SD card. To view your images, you’ll need to visit the camera and remove the memory card or connect the camera to a computer. These models remain the most popular choice for many hunters because they are reliable, affordable, and require no monthly subscription.
Best for:
- Hunters who scout local properties
- Budget-conscious buyers
- Areas with poor cellular coverage
- Long-term monitoring with minimal recurring costs
Pros
- Lower purchase price
- No data plan required
- Excellent battery life
- Simple to operate
- Available in a wide range of price points
Cons
- You must physically retrieve photos
- More trips into the field can leave scent and disturb wildlife
- Delayed access to scouting information
Cellular Trail Cameras
Cellular trail cameras transmit photos and videos over a mobile network directly to a smartphone app or cloud account. Instead of walking to every camera, you receive updates almost immediately after activity occurs. For hunters managing large properties or multiple hunting locations, this can be a significant advantage.
Best for:
- Remote hunting properties
- Large farms and leases
- Outfitters
- Wildlife managers
- Property surveillance
Pros
- Receive images without visiting the camera
- Less disturbance in hunting areas
- Remote camera settings
- Cloud storage options
- Instant activity alerts
Cons
- Higher initial cost
- Monthly subscription fees
- Battery life is generally shorter than non-cellular models
- Requires reliable cellular coverage
Wi-Fi Trail Cameras
Wi-Fi trail cameras create a local wireless connection that allows you to download images when you’re nearby without removing the SD card. Unlike cellular cameras, they do not send images over the internet.
Best for:
- Properties close to home
- Backyard wildlife observation
- Users who want wireless access without subscription fees
Bluetooth Trail Cameras
Bluetooth models offer short-range connectivity for adjusting settings or downloading photos from your phone. Since Bluetooth range is limited, you’ll still need to approach the camera, but you won’t need to remove the SD card.
Solar Trail Cameras
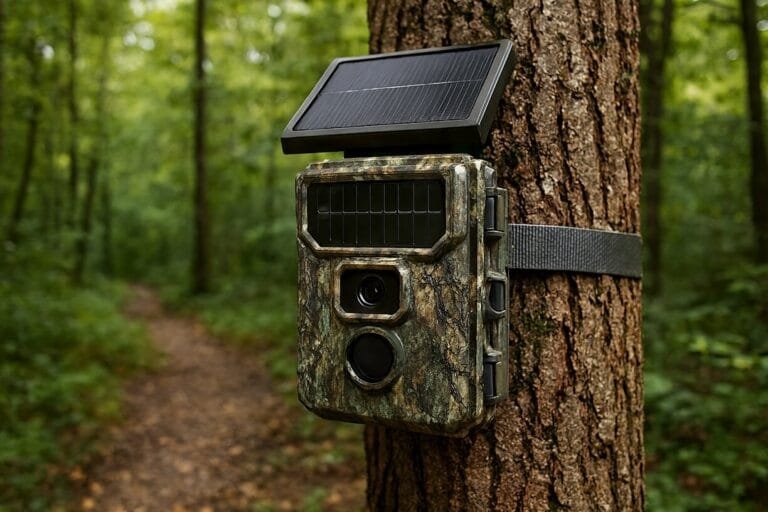
Some cameras include integrated solar panels, while others support external solar charging systems. Solar power helps extend deployment times and reduces battery replacements, making it ideal for long-term monitoring. These cameras work especially well in open areas that receive consistent sunlight.
Time-Lapse Trail Cameras
Instead of relying solely on motion detection, time-lapse cameras capture photos at scheduled intervals. This feature is especially useful when monitoring:
- Large food plots
- Agricultural fields
- Open meadows
- Habitat restoration projects
- Wildlife population trends
Many premium cameras allow both motion-triggered and time-lapse recording simultaneously.
Trail Camera Technologies Compared
| Type | Best For | Monthly Fee | Battery Life | Image Access |
| Standard | Most hunters | No | Excellent | SD card |
| Cellular | Remote scouting | Yes | Good | Smartphone app |
| Wi-Fi | Nearby properties | No | Good | Local Wi-Fi |
| Bluetooth | Easy setup | No | Good | Bluetooth |
| Solar | Long deployments | Optional | Excellent | Depends on model |
Understanding Trail Camera Features
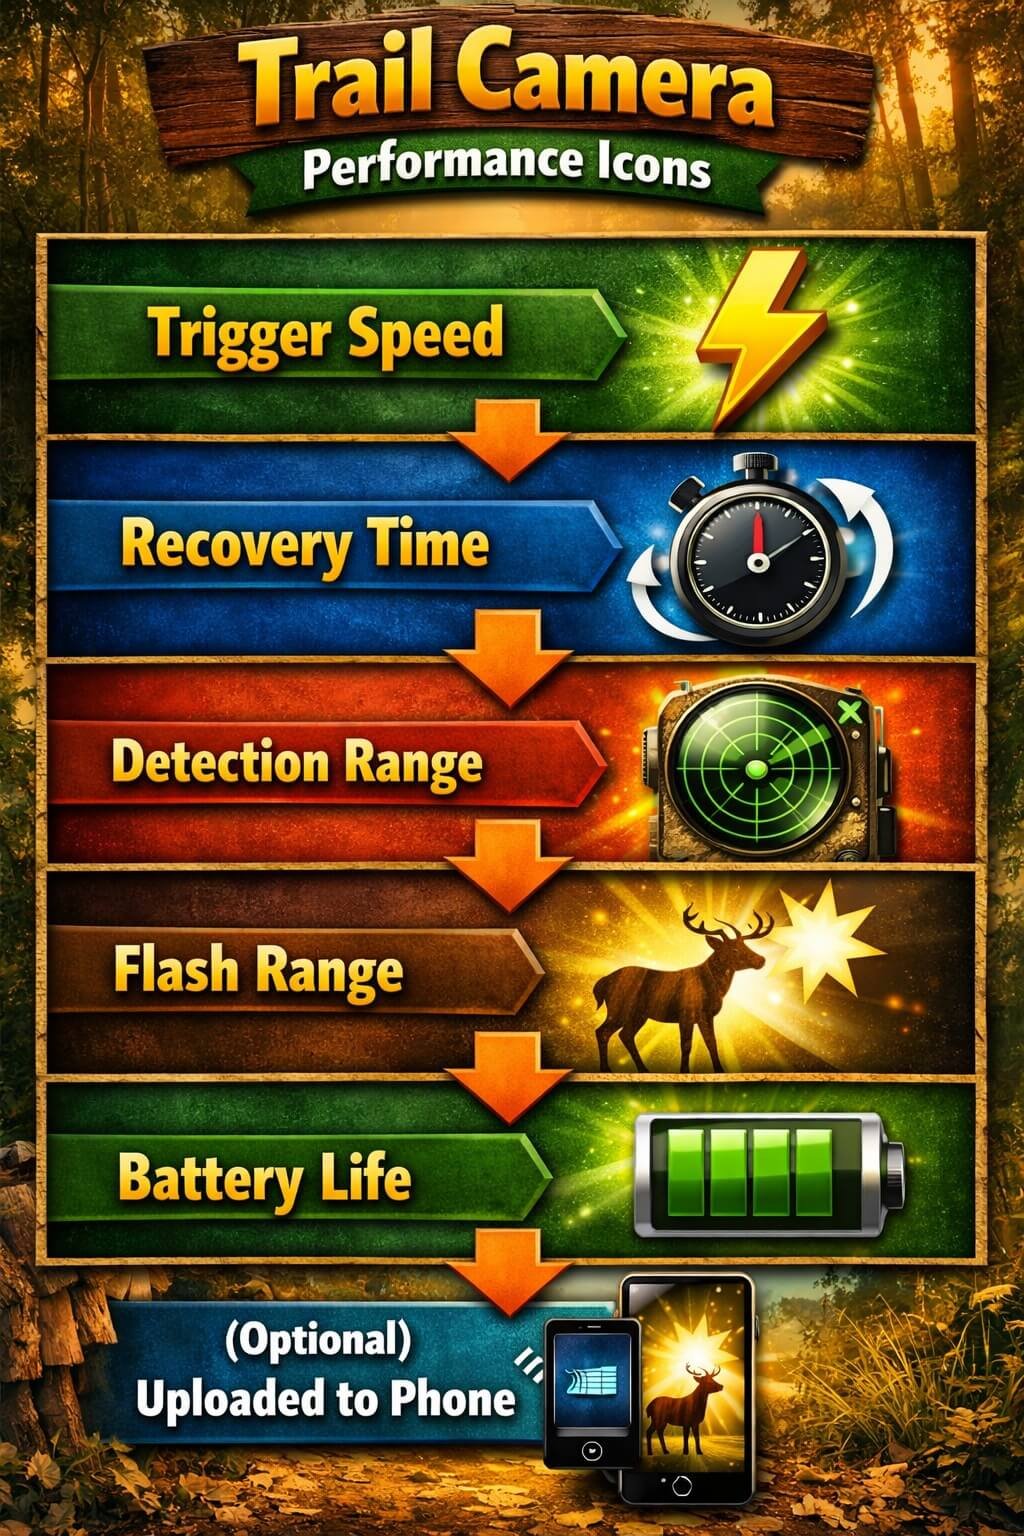
Trail camera specifications can seem overwhelming at first. Manufacturers advertise megapixels, trigger speeds, detection ranges, flash distances, and countless other numbers—but not every specification matters equally.
Knowing which features have the biggest impact on real-world performance will help you choose a camera based on actual needs rather than marketing claims.
Image Resolution
Image resolution determines the amount of detail captured in each photograph. Manufacturers often advertise very high megapixel numbers, but it’s important to distinguish between native resolution and interpolated resolution.
- Native resolution is produced by the camera’s actual image sensor.
- Interpolated resolution is digitally enlarged using software and doesn’t add real detail.
For most hunters, a quality native sensor produces sharper, more useful images than a camera advertising inflated megapixel counts.
Recommended Image Quality
| Use | Recommended Resolution |
| Basic scouting | 12–16 MP |
| General hunting | 16–24 MP |
| Wildlife photography | 24 MP+ |
| Identification of distant animals | Higher native resolution preferred |
Remember that image clarity depends on the sensor, lens quality, lighting, and processing—not just megapixels.
Video Resolution
Many hunters focus only on photos, but video can reveal behaviors that still images miss.
Videos can show:
- Direction of travel
- Group interactions
- Dominance behavior
- Rutting activity
- Time spent feeding
- Animal health
Common recording options include:
- HD (720p)
- Full HD (1080p)
- 2K
- 4K
Higher resolutions produce more detail but require additional storage and battery power.
Trigger Speed
Trigger speed is the amount of time between detecting movement and capturing an image. A slow trigger speed can result in missed opportunities, especially when animals move quickly across narrow trails.
General Guidelines
| Trigger Speed | Performance |
| Under 0.2 sec | Outstanding |
| 0.2–0.4 sec | Excellent |
| 0.4–0.6 sec | Very Good |
| 0.6–1.0 sec | Acceptable |
| Over 1 sec | May miss fast-moving animals |
For deer trails, travel corridors, and game crossings, faster trigger speeds generally provide better results.
Recovery Time
Recovery time measures how quickly the camera is ready to capture another image after taking the first one. Short recovery times are especially valuable when multiple animals pass the camera in quick succession. A camera with fast recovery can document an entire group rather than capturing only the lead animal.
Detection Range
Detection range refers to the maximum distance at which the motion sensor can reliably detect movement. Typical ranges include:
- 50 feet
- 70 feet
- 80 feet
- 100 feet
- 120+ feet
Longer isn’t always better. A very wide detection zone may capture unnecessary activity, leading to more empty images and increased battery use. The ideal detection range should complement your intended camera placement.
Detection Angle
The detection angle determines how wide an area the sensor monitors.
- Narrow angles work well on trails and funnels.
- Wider angles are useful for food plots and open fields.
A balanced combination of detection angle and detection range usually produces the most reliable results.
Flash Range
Flash range determines how far the camera can illuminate subjects at night. Longer flash distances improve image quality in larger openings but generally consume more battery power. We’ll cover flash technologies—including No Glow, Low Glow, and White Flash—in the next section, along with when each type performs best.
Flash Technologies Explained
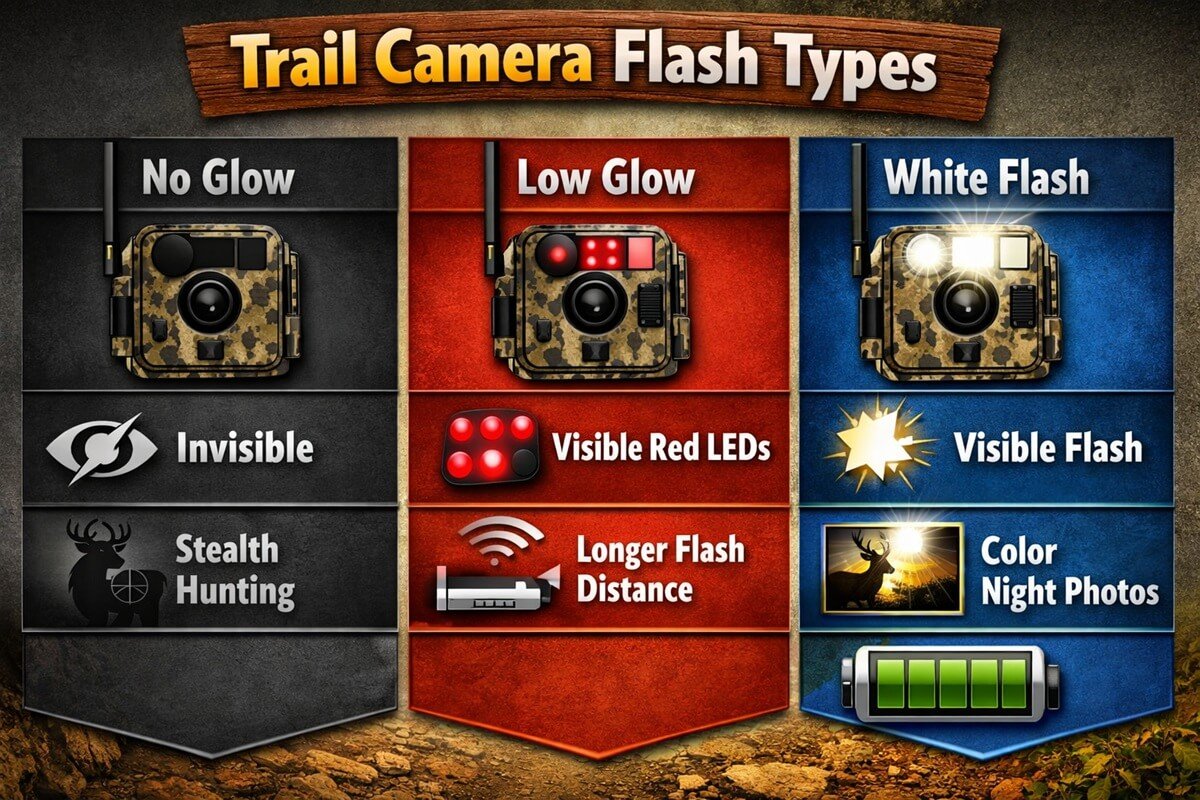
One of the biggest differences between trail cameras is the type of flash they use at night. The flash system affects image quality, detection performance, battery life, and how likely wildlife—or people—are to notice the camera.
Understanding the advantages and trade-offs of each flash type will help you choose the right camera for your hunting style and scouting environment.
No Glow (940nm Infrared)
No Glow, also known as black flash, uses infrared LEDs that emit light at approximately 940 nanometers. This wavelength is nearly invisible to both humans and most wildlife.
Because there is little or no visible light when the camera takes a nighttime photo, No Glow cameras are the preferred choice for hunters who want to minimize disturbance and keep cameras hidden from potential thieves.
Best For
- Deer hunting
- Public land scouting
- Property surveillance
- High-theft areas
- Long-term camera deployments
Advantages
- Nearly invisible at night
- Less likely to spook mature bucks
- Excellent for covert surveillance
- Harder for trespassers to locate
Disadvantages
- Slightly shorter flash range
- Night images may be slightly darker than Low Glow models
For most hunters, No Glow cameras provide the best balance between stealth and performance.
Low Glow (850nm Infrared)
Low Glow cameras use infrared LEDs that produce a faint red glow when activated. Although much less noticeable than a traditional camera flash, the red illumination can sometimes be seen by animals and people standing nearby.
The benefit is increased nighttime brightness and longer flash distances.
Best For
- Large food plots
- Open fields
- Wildlife photography
- Areas with minimal hunting pressure
Advantages
- Brighter nighttime images
- Greater flash distance
- Improved image detail
Disadvantages
- Small visible red glow
- Slightly easier for people to locate
- May alert particularly cautious wildlife
Many experienced hunters report little difference in deer behavior, while others prefer No Glow models for mature bucks in heavily hunted areas.
White Flash
White Flash trail cameras use a traditional camera flash to produce full-color nighttime photographs. These cameras create the highest-quality night images but are much more noticeable.
Best For
- Wildlife research
- Nature photography
- Scientific studies
- Locations without hunting pressure
Advantages
- Full-color nighttime images
- Excellent detail
- Superior image clarity
Disadvantages
- Bright visible flash
- Can startle wildlife
- Easy for people to locate
- Generally not recommended for hunting applications
Which Flash Type Should You Choose?
| Flash Type | Visibility | Night Image Quality | Hunting | Security |
| No Glow | Nearly invisible | Very Good | ⭐⭐⭐⭐⭐ | ⭐⭐⭐⭐⭐ |
| Low Glow | Faint red glow | Excellent | ⭐⭐⭐⭐☆ | ⭐⭐⭐☆☆ |
| White Flash | Highly visible | Outstanding | ⭐⭐☆☆☆ | ⭐☆☆☆☆ |
Recommendation: For most hunters, No Glow cameras offer the best combination of stealth, reliability, and consistent field performance.
Power Options and Battery Life
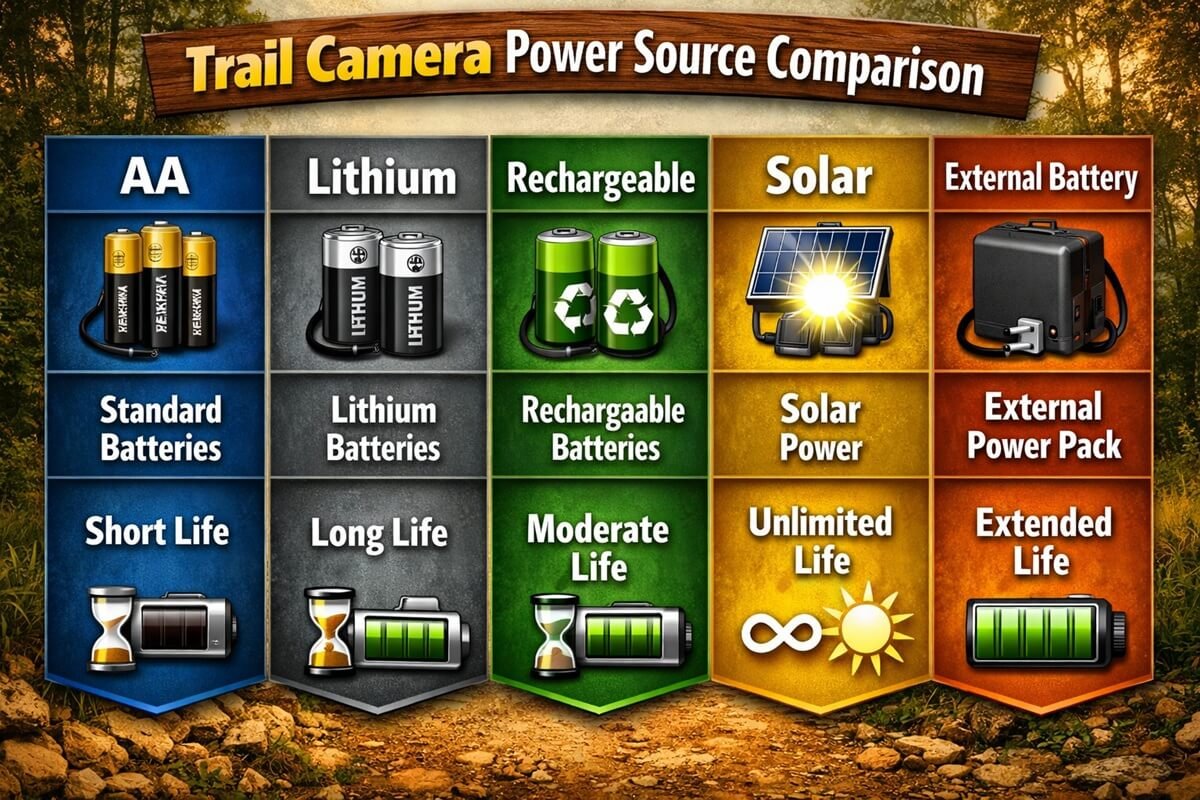
A trail camera is only useful if it remains powered when wildlife appears. Battery life depends on several factors, including temperature, image frequency, flash usage, video recording, and cellular transmissions. Choosing the right power source can significantly reduce maintenance and keep your camera operating throughout the season.
AA Alkaline Batteries
Alkaline batteries are inexpensive and widely available, making them a common choice for casual users.
Pros
- Low cost
- Easy to find
- Suitable for warm weather
Cons
- Shorter lifespan
- Poor cold-weather performance
- Higher long-term cost if replaced frequently
Lithium Batteries
Lithium batteries are widely considered the best option for trail cameras, especially in demanding environments.
Advantages
- Longer battery life
- Better cold-weather performance
- Lighter weight
- More stable voltage output
- Lower risk of leakage
Although they cost more initially, lithium batteries often last significantly longer, making them more economical over time.
Rechargeable Batteries
Rechargeable NiMH batteries are an environmentally friendly option but typically provide lower voltage than disposable batteries. High-quality rechargeable batteries work well for frequently checked cameras but may require more regular charging during heavy use.
External Battery Packs
Many advanced trail cameras support external 6V or 12V battery packs. These systems can dramatically extend deployment time, especially for:
- Cellular cameras
- High-traffic areas
- Video recording
- Long-term monitoring
Hunters managing multiple cameras often rely on external batteries to reduce maintenance trips.
Solar Panels
Solar charging systems have become increasingly popular in recent years. Compatible solar panels continuously recharge the camera’s internal battery during daylight hours, reducing the need for battery replacements. Solar systems perform best in open locations with consistent sunlight and are ideal for year-round monitoring.
Tips to Maximize Battery Life
Even the best batteries can drain quickly if your camera settings aren’t optimized. To extend runtime:
- Use photo mode instead of video when possible.
- Limit burst mode unless necessary.
- Reduce video length.
- Disable unnecessary features.
- Use high-quality lithium batteries.
- Update firmware regularly.
- Position cameras to avoid false triggers caused by moving vegetation.
- Keep sensors clean.
A well-configured camera can often operate for several months without maintenance.
Memory Cards and Storage
Every photo and video captured by your trail camera must be stored somewhere. Choosing the right memory card improves reliability and helps prevent data loss in the field.
SD Card Capacity
Most trail cameras support SD cards ranging from 16 GB to 128 GB, although some newer models support even larger capacities.
General Recommendations
| Usage | Recommended Capacity |
| Photos only | 32 GB |
| Photos + HD Video | 64 GB |
| Frequent 4K Video | 128 GB |
Always check your camera’s specifications before purchasing larger-capacity cards.
SD Card Speed
Card speed affects how quickly images are written to storage. For modern trail cameras, Class 10 or UHS-I cards provide reliable performance. Slower cards may occasionally delay image recording or create compatibility issues.
Formatting Your SD Card
Before deploying a new camera:
- Insert the SD card.
- Use the camera’s built-in format function.
- Confirm formatting.
- Begin recording.
Formatting inside the camera helps reduce file corruption and ensures maximum compatibility.
Managing Storage Efficiently
To avoid running out of space:
- Delete old images after downloading.
- Use separate cards for different cameras.
- Label SD cards clearly.
- Store backups on a computer or cloud service.
Developing a consistent storage routine makes organizing large numbers of scouting photos much easier throughout the season.
Cellular Trail Cameras Explained
Cellular trail cameras have transformed wildlife monitoring by allowing hunters to receive images remotely, often within seconds of capture.
Instead of walking into the woods to retrieve an SD card, photos are transmitted through a cellular network to a smartphone app or web portal. This reduces human scent, minimizes disturbance, and provides near real-time updates on wildlife activity.
How Cellular Cameras Work
A cellular trail camera combines a traditional motion-activated camera with a built-in modem and SIM technology. The process is straightforward:
- Motion is detected.
- The camera captures an image or video.
- The file is compressed if necessary.
- It connects to the strongest available cellular network.
- The image uploads to the manufacturer’s cloud service.
- You receive a notification on your smartphone.
Some premium models also allow you to:
- Change camera settings remotely
- Request on-demand photos
- Update firmware over the air
- Monitor battery level
- Check SD card capacity
- View GPS location
Are Cellular Trail Cameras Worth It?
They can be an excellent investment if you:
- Manage multiple hunting properties
- Scout areas several hours from home
- Want instant movement alerts
- Hunt mature bucks that are sensitive to human pressure
- Use cameras for property security
However, if you primarily hunt a small local property and don’t mind checking cameras regularly, a quality non-cellular model may provide better overall value.
If you’re considering a remote scouting setup, check out our in-depth guide to the best cellular trail cameras under $200 for a detailed comparison of top models, network compatibility, and subscription plans.
How to Choose the Right Trail Camera?
The best trail camera isn’t necessarily the one with the highest price tag or the longest feature list. The right choice depends on how, where, and why you plan to use it. Before comparing specifications, consider your hunting style, property size, target species, and budget. A camera that’s perfect for monitoring a remote deer lease may be unnecessary for a backyard wildlife enthusiast.
The following factors should guide your decision.
1. Define Your Primary Purpose
Start by asking yourself what you expect your trail camera to accomplish.
For example:
- Scouting mature whitetail bucks
- Monitoring turkey activity
- Observing bears or predators
- Property surveillance
- Wildlife photography
- Habitat management
- Research or conservation
Once you’ve identified your primary goal, it becomes much easier to prioritize the features that matter most.
2. Consider Your Hunting Property
The size and accessibility of your hunting area play a major role in camera selection.
Small Properties
If you hunt private land close to home, a standard non-cellular trail camera is often the most practical and cost-effective option.
Large Farms and Leases
If your cameras are spread across hundreds of acres, cellular models can save countless hours by delivering images remotely.
Public Land
Public-land hunters should prioritize:
- No Glow infrared flash
- Compact designs
- Password protection
- GPS tracking (if available)
- Security boxes and cable locks
These features help reduce the risk of theft and minimize disturbances to wildlife.
3. Match Features to Your Needs
It’s easy to be drawn to impressive specifications, but not every feature provides meaningful benefits. Here’s what matters most for most hunters:
| Feature | Importance |
| Trigger Speed | ⭐⭐⭐⭐⭐ |
| Detection Reliability | ⭐⭐⭐⭐⭐ |
| Battery Life | ⭐⭐⭐⭐⭐ |
| Night Image Quality | ⭐⭐⭐⭐☆ |
| Weather Resistance | ⭐⭐⭐⭐☆ |
| Video Resolution | ⭐⭐⭐☆☆ |
| Megapixels | ⭐⭐☆☆☆ |
A reliable camera with excellent detection performance will usually outperform one that simply advertises higher megapixel numbers.
4. Think About Long-Term Costs
The purchase price is only part of the total investment. Also consider ongoing expenses such as:
- Batteries
- SD cards
- Cellular subscriptions
- External battery packs
- Solar panels
- Security accessories
Factoring in these costs upfront can help you choose a camera that’s affordable to operate over multiple hunting seasons.
5. Buy for Reliability, Not Marketing
Manufacturers often emphasize eye-catching numbers, but field performance matters far more than advertised specifications. Before making a purchase, look for independent testing that evaluates:
- Trigger consistency
- Detection accuracy
- Battery longevity
- Nighttime image quality
- Durability in harsh weather
- Ease of use
A dependable camera that performs consistently in real hunting conditions is worth far more than one with inflated specifications.
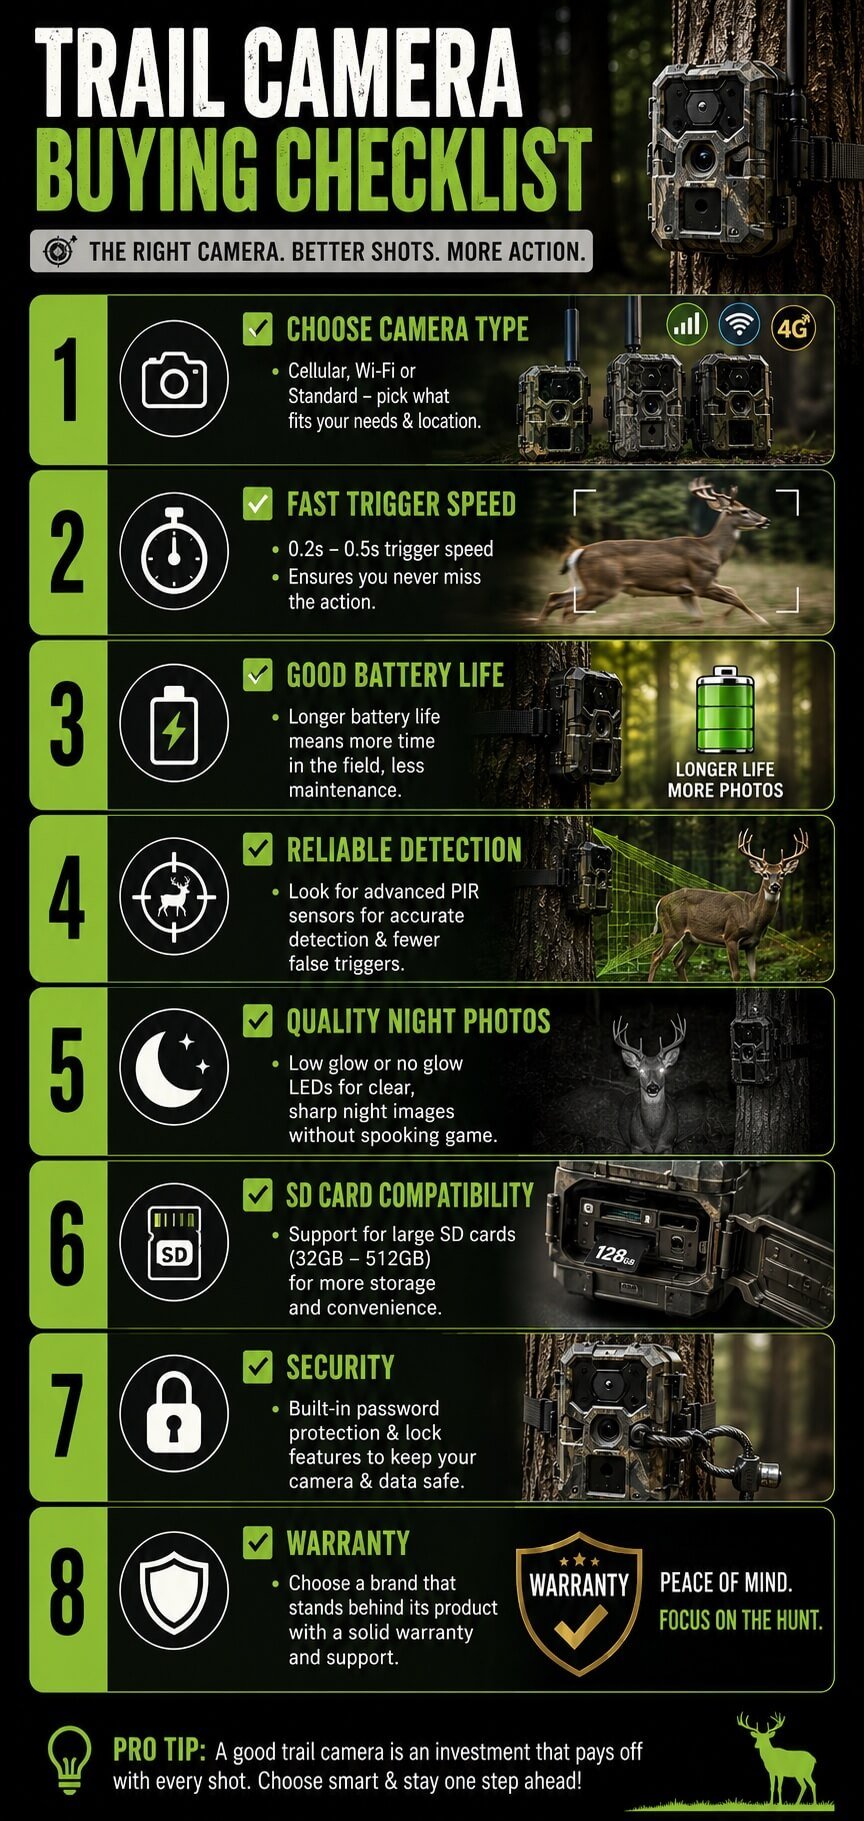
Trail Camera Buying Checklist
Before purchasing a trail camera, make sure it offers:
- Reliable motion detection
- Fast trigger speed
- Good recovery time
- High-quality daytime images
- Clear nighttime performance
- Durable weatherproof construction
- Long battery life
- Compatible SD card support
- Easy-to-use controls
- Manufacturer warranty
Use this checklist to compare different models and avoid paying for features you may never use.
Matching Trail Cameras to Different Hunting Styles
Different hunting situations require different camera setups.
Whitetail Deer Hunting
Prioritize:
- No Glow flash
- Fast trigger speed
- Long battery life
- Excellent detection accuracy
These features help capture mature bucks while minimizing disturbance.
Turkey Hunting
Wide detection angles and quality daytime images are especially useful for monitoring feeding areas and travel routes.
Predator Hunting
Coyotes, bobcats, and other predators often move quickly, making fast trigger speeds and rapid recovery times especially important.
Bear Country
Choose cameras with:
- Rugged construction
- Reinforced mounting options
- Lockable security boxes
- Strong weather sealing
Bears are naturally curious and can easily damage unprotected cameras.
Wildlife Photography
Photographers often prioritize:
- High native image resolution
- Superior video quality
- Longer flash range
- Time-lapse functionality
- White Flash or Low Glow options (where appropriate)
Trail Camera Placement Basics
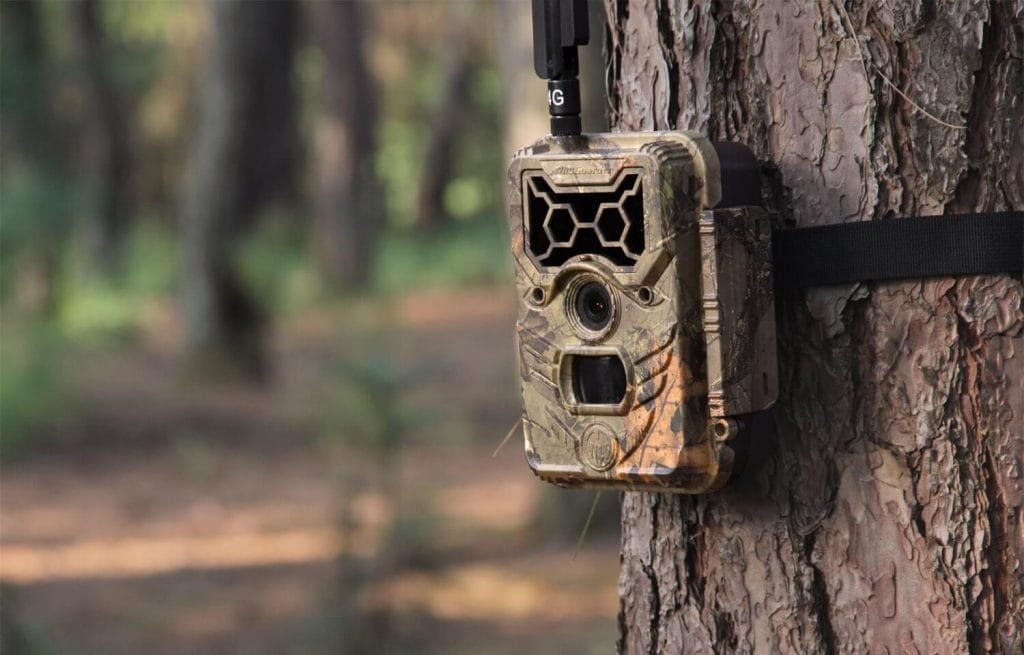
Even the most expensive trail camera cannot compensate for poor placement. Proper positioning dramatically improves image quality, reduces empty photos, and increases the likelihood of capturing useful wildlife activity. While placement strategies vary depending on terrain and target species, several universal principles apply.
Position Cameras at the Right Height
For deer scouting, mounting a camera approximately 3 to 4 feet above the ground works well in most situations. Adjust the height based on:
- Animal size
- Terrain
- Vegetation
- Camera angle
Slightly elevated mounting positions can also make cameras less noticeable to people.
Avoid Direct Sunlight
Pointing a camera directly toward the rising or setting sun often results in:
- Overexposed photos
- Lens flare
- False motion triggers
- Reduced image quality
Whenever possible, position cameras facing north or south to minimize harsh lighting.
Clear Nearby Vegetation
Branches, tall grass, vines, and weeds moving in the wind are among the most common causes of false triggers. Before leaving the camera:
- Remove nearby vegetation
- Check for overhanging branches
- Clear tall grass within the detection zone
Doing so can significantly improve battery life and reduce unnecessary images.
Monitor Natural Travel Corridors
Wildlife naturally follows areas of least resistance.
Look for:
- Well-used game trails
- Funnel points
- Creek crossings
- Fence crossings
- Ridge lines
- Saddle crossings
- Food plot entrances
These locations typically produce more consistent activity than random areas of the woods.
Keep Human Disturbance Low
Each visit leaves scent and creates disturbance. To minimize pressure:
- Wear clean boots.
- Limit unnecessary visits.
- Check cameras during midday.
- Avoid entering bedding areas too frequently.
Reducing disturbance helps maintain natural animal movement patterns.
For detailed placement strategies, seasonal examples, and species-specific recommendations, read our complete Trail Camera Placement Guide.
Trail Camera Setup Basics
A proper setup ensures your camera performs reliably from day one. Before placing a camera in the field, follow these basic steps:
- Install fresh batteries.
- Insert and format the SD card.
- Update the firmware if available.
- Set the correct date and time.
- Choose your photo or video mode.
- Adjust trigger sensitivity.
- Test the detection zone.
- Secure the camera to a tree or mounting bracket.
- Lock the housing if necessary.
- Walk through the detection area to verify operation.
Taking a few extra minutes to test your setup can prevent weeks of missed scouting opportunities.
Need step-by-step instructions? Follow our complete Trail Camera tips for better shots, which covers installation, settings, testing, and troubleshooting in detail.
Understanding Trail Camera Settings
Many hunters leave their camera on the factory default settings, but making a few adjustments can dramatically improve results. The ideal settings depend on where the camera is deployed and what you’re trying to capture.
Photo Mode
Best for:
- General scouting
- Long battery life
- Large numbers of captures
Video Mode
Best for:
- Observing animal behavior
- Identifying travel direction
- Studying herd interactions
Burst Mode
Captures multiple images with each trigger. Ideal for fast-moving wildlife but uses more storage and battery power.
Trigger Sensitivity
Higher sensitivity works well for:
- Small animals
- Cooler temperatures
- Slow-moving wildlife
Lower sensitivity helps reduce false triggers in windy conditions or areas with dense vegetation.
Recovery Delay
This determines how long the camera waits before it can trigger again.
- Short delays capture more activity.
- Longer delays conserve battery life and storage.
Choosing the right balance depends on traffic levels at your camera location.
Seasonal Trail Camera Strategies
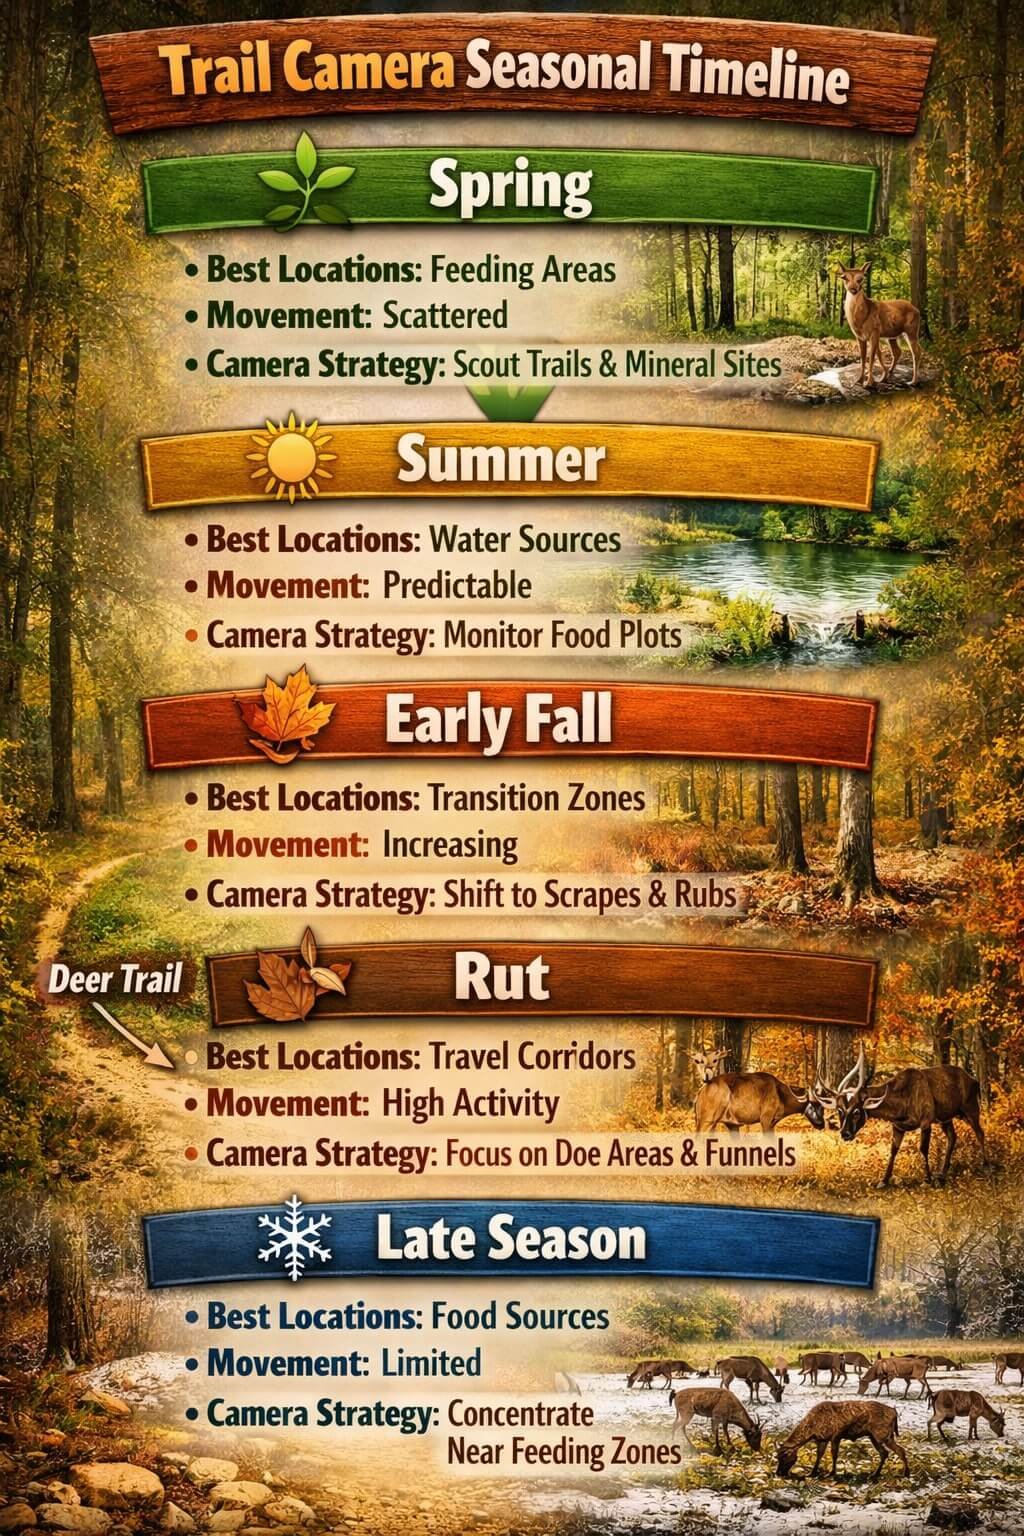
Wildlife behavior changes throughout the year, and your trail camera strategy should change with it. Camera locations that produce excellent results in early summer may become almost useless during the rut or late season.
Understanding seasonal movement patterns helps you gather more meaningful data while minimizing unnecessary disturbance.
Spring
Spring is an excellent time to inventory wildlife after winter and monitor habitat recovery.
Focus Areas
- Green food sources
- Field edges
- Creek crossings
- Wildlife openings
- Turkey strutting zones
What You’ll Learn
- Which animals survived the winter
- Early antler development in bucks
- Turkey flock locations
- Predator activity
- General herd health
Spring is also a great time to evaluate habitat improvements such as food plots, new water sources, and timber management projects.
Summer
Summer provides one of the best opportunities to build a complete inventory of local deer. Bucks often follow predictable feeding patterns and spend considerable time in bachelor groups before velvet is shed.
Ideal Camera Locations
- Mineral sites (where legal)
- Food plots
- Agricultural field edges
- Water sources
- Travel routes between bedding and feeding areas
Summer photos can help estimate:
- Age structure
- Antler growth
- Herd size
- Fawn recruitment
- Daily movement patterns
Avoid checking cameras too frequently. Excessive disturbance can alter natural behavior.
Early Fall
As hunting season approaches, deer begin shifting from summer routines toward fall feeding patterns. This is an ideal time to move cameras closer to:
- Funnels
- Scrapes
- Oak flats
- Travel corridors
- Transition areas
Many mature bucks also begin reducing daylight movement. Focus on documenting travel routes rather than simply locating deer.
The Rut
The rut creates some of the most exciting trail camera activity of the year. Movement increases dramatically as bucks search for receptive does, often appearing in locations where they were rarely seen earlier in the season.
High-Percentage Camera Locations
- Community scrapes
- Funnels
- Saddles
- Ridge crossings
- Creek crossings
- Doe bedding area edges
Rather than monitoring food sources alone, prioritize travel corridors connecting doe concentrations.
Late Season
After the rut, deer become focused on recovering lost body weight. Food once again becomes the primary attraction. Consider placing cameras near:
- Standing crops
- Winter food plots
- Thermal cover
- South-facing slopes
- Remaining mast sources
Battery performance often declines in freezing temperatures, making lithium batteries especially valuable during late-season deployments.
Advanced Deer Scouting with Trail Cameras
Trail cameras do far more than simply confirm that deer are present. When used strategically, they can reveal movement patterns, travel routes, seasonal behavior, and preferred habitat. The goal isn’t collecting thousands of photos—it’s collecting information that improves your hunting decisions.
Identify Travel Patterns
One photo rarely tells the full story. Instead, look for trends such as:
- Time of day
- Wind direction
- Weather conditions
- Moon phase (if recorded)
- Temperature
- Direction of travel
Patterns become much more valuable than individual sightings.
Build a Buck Inventory
Throughout the summer and early fall, identify individual bucks using unique characteristics such as:
- Antler shape
- Split tines
- Brow tine length
- Body size
- Facial markings
- Ear notches
Naming mature bucks may seem unnecessary, but consistent identification makes it easier to track movement over time.
Monitor Scrapes Throughout the Season
Community scrapes often attract multiple bucks over several weeks. Rather than placing the camera directly over the scrape, position it along the approach trail whenever possible. This often captures more natural movement and provides better shot opportunities.
Track Daylight Activity
A mature buck appearing exclusively after dark provides very different information than one consistently moving during legal shooting hours. Pay close attention to:
- Sunrise movement
- Sunset activity
- Weather-related movement
- Fronts and pressure changes
These observations can help narrow down the most productive hunting windows.
Don’t Chase Every Photo
One common mistake is moving cameras every time a mature buck appears elsewhere. Instead, collect enough data to establish reliable patterns before making major adjustments. Consistent information usually outperforms constant relocation.
Using Trail Cameras for Other Wildlife
Although deer hunting drives much of the trail camera market, these cameras are valuable for many other species.
Turkey
Monitor:
- Strut zones
- Dusting areas
- Feeding fields
- Roost approach routes
Time-lapse mode can be especially useful in open fields where turkeys may not trigger motion sensors consistently.
Elk
Elk often cover large distances. Focus cameras on:
- Wallows
- Water sources
- Meadow edges
- Mountain saddles
- Well-used trails
Large detection ranges can be beneficial in western hunting environments.
Bears
Bears frequently investigate trail cameras out of curiosity. Protect cameras with:
- Metal security boxes
- Elevated mounting positions
- Locking cables
Monitoring bait sites should always comply with local hunting regulations.
Predators
Coyotes, bobcats, foxes, and mountain lions often use the same travel routes repeatedly.
Place cameras near:
- Fence crossings
- Creek bottoms
- Logging roads
- Narrow travel corridors
Fast trigger speeds become especially important because predators often move quickly through the detection zone.
Small Game
Trail cameras can also monitor:
- Rabbits
- Squirrels
- Raccoons
- Opossums
- Badgers
Increasing trigger sensitivity may improve detection of smaller animals.
Trail Camera Security and Theft Prevention
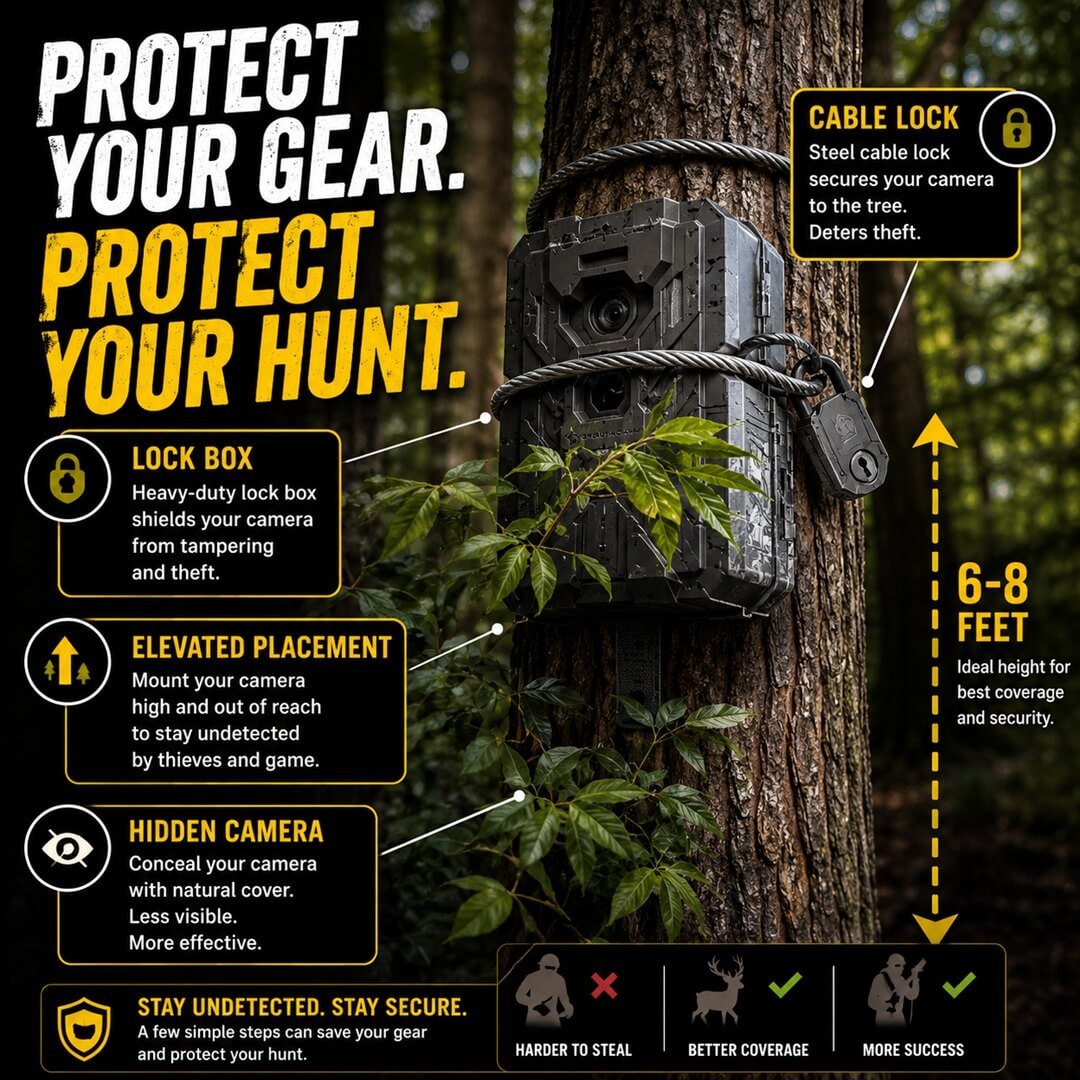
Trail cameras represent a significant investment, making theft prevention an important consideration. Fortunately, a few simple precautions can greatly reduce the risk of losing equipment.
Use Security Boxes
Steel security boxes provide excellent protection against:
- Theft
- Vandalism
- Curious bears
- Accidental damage
Most are compatible with cable locks and padlocks or mounts for additional security.
Install Python Cable Locks
A quality locking cable secures the camera firmly to a tree. Although determined thieves can still remove equipment, locks increase the time and effort required.
Mount Cameras Higher
Mounting cameras 8–10 feet above ground while angling them downward makes them significantly harder to notice. This strategy is particularly effective on public land.
Enable Password Protection
Many modern cameras allow you to set a password that prevents unauthorized users from accessing settings or stored images.
Consider GPS-Enabled Models
Some premium trail cameras include GPS tracking or location recovery features. These can be especially valuable for expensive cellular models.
Avoid Obvious Locations
Many cameras are stolen because they’re mounted exactly where people expect to find them. Instead of placing cameras directly beside trails:
- Offset them several yards.
- Angle toward the trail.
- Use natural cover.
- Break up the camera’s outline.
Small placement adjustments can dramatically improve concealment.
Trail Camera Maintenance
Routine maintenance helps extend the lifespan of your camera and ensures reliable performance season after season.
Inspect Before Every Deployment
Check for:
- Cracked housing
- Loose seals
- Corroded battery contacts
- Damaged straps
- Dirty lenses
- Worn gaskets
Replacing inexpensive parts early can prevent expensive failures later.
Clean the Lens
Dust, pollen, rain spots, and fingerprints reduce image quality.
Use:
- Microfiber cloth
- Lens-safe cleaning solution
- Soft air blower
Avoid abrasive materials that could scratch the lens.
Update Firmware
Manufacturers periodically release firmware updates that improve:
- Stability
- Detection accuracy
- Battery efficiency
- Cellular connectivity
- Security
Always follow the manufacturer’s update instructions carefully.
Store Cameras Properly
During the off-season:
- Remove batteries.
- Remove SD cards.
- Clean the housing.
- Store in a cool, dry location.
Proper storage helps prevent corrosion and extends the camera’s service life.
Common Trail Camera Mistakes
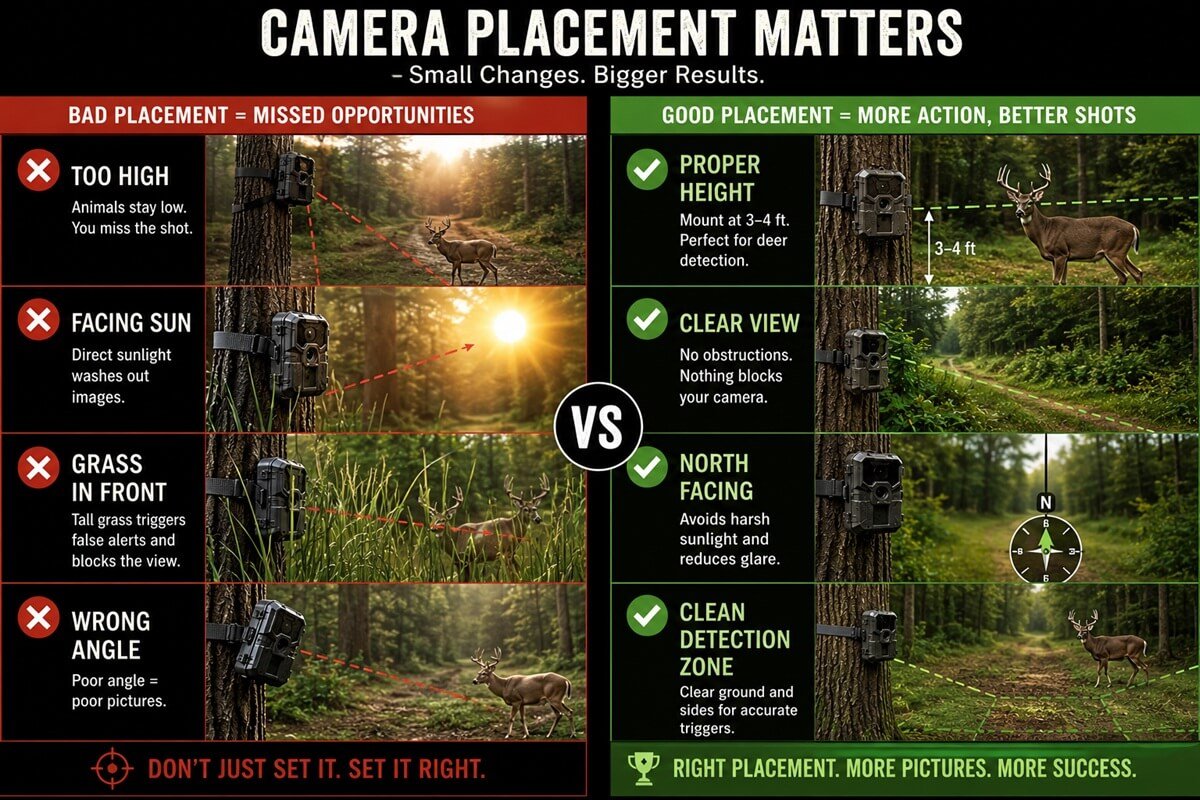
Even experienced hunters occasionally make mistakes that reduce camera performance. Avoid these common errors:
- Mounting the camera too high or too low
- Facing the rising or setting sun
- Leaving vegetation in the detection zone
- Using low-quality batteries
- Forgetting to format the SD card
- Checking cameras too frequently
- Ignoring firmware updates
- Buying based solely on megapixels
- Placing cameras without considering prevailing winds
- Failing to test the detection zone before leaving
Trail Camera Troubleshooting Guide
Even the best trail cameras occasionally experience issues. Most problems can be resolved quickly with proper troubleshooting.
Camera Won’t Turn On
Possible Causes
- Dead batteries
- Incorrect battery installation
- Corroded battery contacts
- Faulty power switch
- Water damage
Solutions
- Install fresh lithium batteries.
- Check battery orientation.
- Clean battery contacts carefully.
- Test with another battery set.
- Inspect for moisture inside the housing.
Camera Takes Empty Photos
Empty images are one of the most common complaints.
Common Causes
- Moving grass
- Tree branches
- Direct sunlight
- Rapid temperature changes
- Improper sensitivity settings
Solutions
- Clear vegetation within the detection zone.
- Face the camera north or south when possible.
- Reduce motion sensitivity.
- Reposition the camera.
Blurry Images
Blurry photos usually result from:
- Dirty lens
- Camera movement
- Subject moving too quickly
- Moisture on the lens
Always tighten mounting straps securely and clean the lens before deployment.
Night Images Are Too Dark
Possible reasons include:
- Weak batteries
- Flash range exceeded
- Dirty flash cover
- Camera aimed too high
Fresh batteries often restore infrared flash performance.
SD Card Errors
If your camera displays memory errors:
- Format the SD card inside the camera.
- Replace damaged cards.
- Use the recommended SD card capacity.
- Avoid removing the card while the camera is writing files.
Short Battery Life
Battery drain may be caused by:
- Excessive video recording
- Thousands of false triggers
- Cold weather
- Cellular transmissions
- Low-quality batteries
Switching to lithium batteries and clearing vegetation usually produces noticeable improvements.
Trail Camera Laws and Ethical Considerations
Trail camera regulations vary by country, state, province, and even individual wildlife management areas. Before placing or using a trail camera, always review the rules that apply where you hunt.
Some jurisdictions regulate or restrict:
- Trail camera use during hunting seasons
- Cellular trail cameras
- Cameras on public land
- Camera use near bait sites
- Placement in designated wildlife areas
- Recording people without consent
Regulations can change from year to year, so verify current requirements before each season.
Respect Wildlife
Trail cameras should help you observe wildlife—not unnecessarily disturb it. Responsible practices include:
- Minimizing visits to sensitive areas
- Avoiding repeated disturbance of bedding sites
- Keeping equipment well maintained
- Removing cameras after the season if required
- Following Leave No Trace principles where appropriate
Ethical scouting helps protect wildlife and preserves opportunities for future hunters.
FAQs About Ultimate Trail Camera Guide
How far should a trail camera be from a deer trail?
The ideal distance depends on the camera’s detection range, lens, and the width of the trail. Positioning the camera far enough back to capture the animal’s full body usually works better than mounting it immediately beside the trail. This also gives the camera more time to detect and photograph an animal moving through the frame.
Should a trail camera face the trail directly?
Not always. Angling the camera slightly across the direction of travel can give the camera more time to capture an animal as it moves through the detection zone. This can be particularly useful on narrow trails where a deer may otherwise pass through the frame quickly.
How can you reduce false triggers from vegetation?
Moving vegetation is a common source of unnecessary photographs. Before deploying the camera, inspect the entire detection zone and remove branches, grass, vines, and other objects that can move in the wind. Recheck the area after installation to make sure the camera has a clear view.
How many trail cameras should you use on a hunting property?
The article does not establish a specific camera-per-acre formula. Instead, camera placement should be based on the property’s size, habitat, travel corridors, food sources, water, and scouting objectives. A smaller property requires fewer strategically positioned cameras, while large farms and leases can benefit from multiple cameras distributed across different areas.
How long should you leave a trail camera in one location?
The guide recommends collecting enough information to identify meaningful movement patterns rather than constantly relocating cameras after individual sightings. Leaving a camera in place long enough to reveal trends in time of day, direction of travel, weather, and seasonal activity can produce more useful information than repeatedly moving it.
What should you look for when reviewing trail camera photos?
Look for patterns rather than isolated photographs. Useful information includes the time of day, direction of travel, weather conditions, temperature, wind direction, moon-phase data when available, and whether the animal appears during daylight or after dark. These patterns can help reveal consistent movement behavior.
Should you use photo or video mode for deer scouting?
Photo mode is generally useful when the goal is efficient scouting, long battery life, and collecting large numbers of captures. Video is more useful when you need to study behavior, travel direction, or interactions between animals. The better option depends on what information you are trying to collect.
What trail camera strategy works best during the rut?
During the rut, deer movement can change substantially from earlier seasons. Instead of focusing exclusively on food sources, the guide recommends paying particular attention to community scrapes, funnels, saddles, ridge crossings, creek crossings, and the edges of doe bedding areas. Cameras placed along travel routes between doe concentrations can provide valuable information about rut movement.
How should trail camera placement change throughout the year?
Camera locations should reflect seasonal changes in wildlife behavior. Spring monitoring can focus on green food sources, creek crossings, openings, and turkey areas. Summer cameras can monitor food plots, water, field edges, and routes between bedding and feeding areas. Fall and rut deployments can shift toward funnels, scrapes, transition areas, saddles, and travel corridors, while late-season cameras can return to concentrated food and thermal-cover areas.
Can trail cameras be useful even when you are not hunting deer?
Yes. The guide describes applications for turkey, elk, bears, coyotes, bobcats, foxes, mountain lions, rabbits, squirrels, raccoons, opossums, and badgers. Trail cameras can also support wildlife photography, habitat monitoring, property surveillance, research, and wildlife population observation.
How can you protect a trail camera from curious wildlife?
Wildlife such as bears can damage or investigate cameras. The guide recommends using steel security boxes, locking cables, and appropriate mounting strategies. In bear country, reinforced mounting and protective housings can help reduce the risk of equipment damage.
Final Thoughts
Trail cameras have become one of the most valuable tools for modern hunters and wildlife lovers. Beyond simply capturing photos, they provide reliable data that helps you understand animal movement, seasonal patterns, habitat use, and overall wildlife activity. Choosing the right camera is only the first step. Proper placement, thoughtful setup, optimized settings, regular maintenance, and careful interpretation of the data are what transform a trail camera into an effective scouting system.
Whether you’re monitoring a single deer trail behind your home or managing dozens of cameras across a large hunting property, focusing on consistent field practices will deliver better results than relying on specifications alone. Use this guide as your central reference, and continue exploring our in-depth resources on trail camera buying guides, setup, placement, batteries, accessories, and advanced scouting strategies to build a more effective and efficient trail camera system.